Friday, September 30, 2016


How to Creatively Decorate a Pumpkin

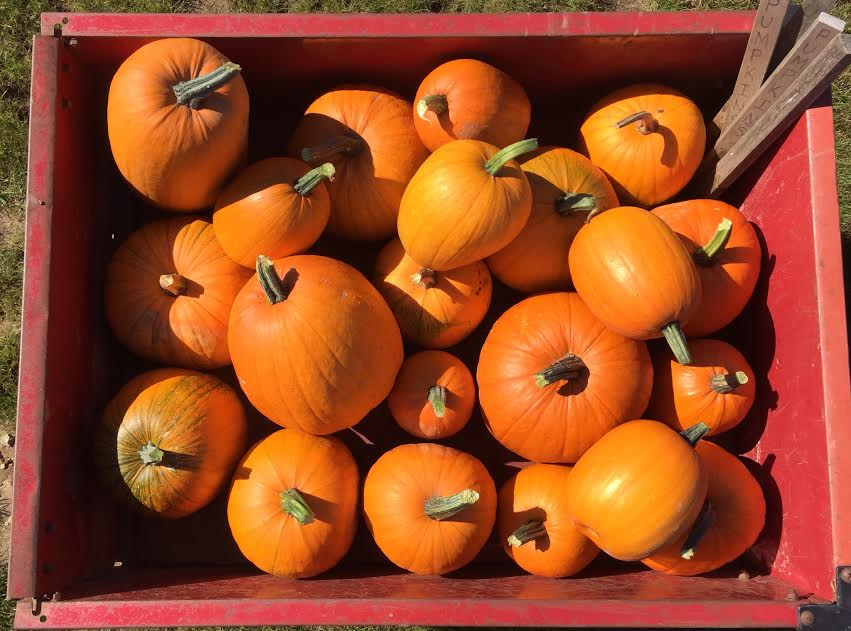
Fall is right around the corner! Fall is by far my favorite season with its football games, bonfires, sweatshirts, and beautiful colors. My family and I harvested pumpkins last weekend that we planted in our own garden. We ended up with a TON, so I decided to get creative with a few of them. They are perfect for decorating and displaying in and outside of your home. It’s a fun and simple way to add to your “fall look”. Take a look.


Materials:
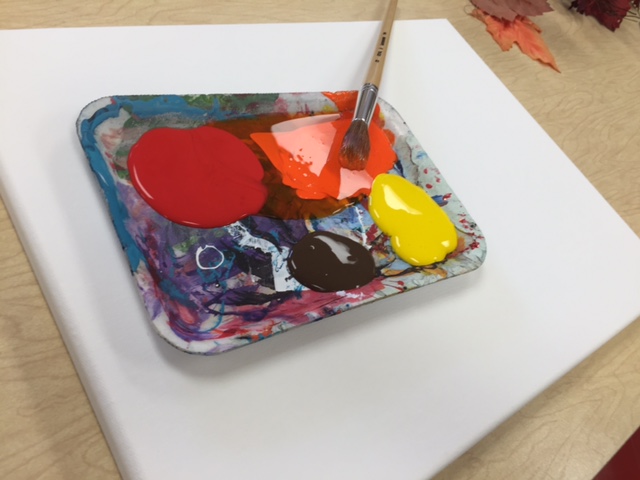
-Acrylic Paint (white and other colors of your choice)
-Crackle acrylic paint
-Paint brush (pick whatever size you feel is necessary)
-Small, artistic brush for details
-Newspaper

Step 1:
First, take a wet paper towel, and clean off the dirt that may be on your pumpkin. Then take a dry paper towel and dry your pumpkin.
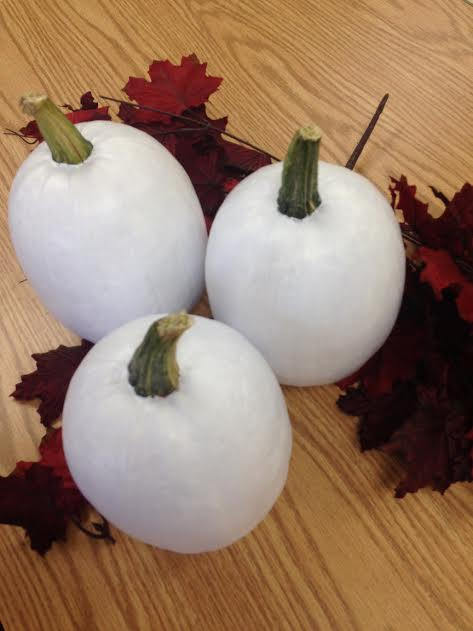
Step 2:
Now you’re ready to paint. I used white acrylic paint as my base color for the 3 pumpkins I decorated. I applied 3 coats.


Step 3:
Decorate your pumpkin! Feel free to decorate the way YOU want to.

The first one I did,, was the black and white crackled pumpkin. After I let my final coat of white paint dry, I applied a thin layer of acrylic crackle, let that dry, and then did a very thin layer of black paint. Slowly, it started cracking, giving a
cool, spooky type look.


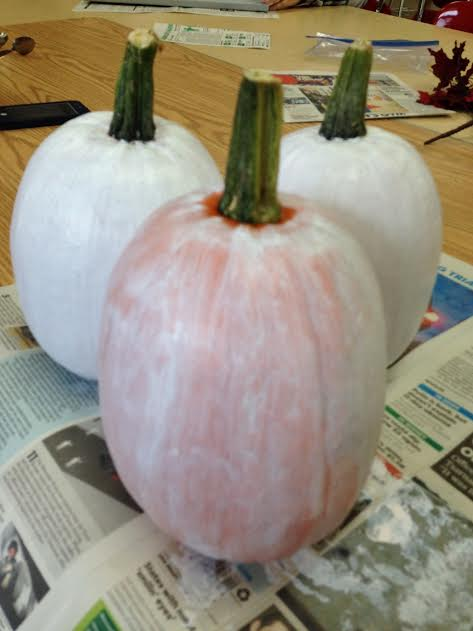
The second pumpkin I decorated,, was the one with orange swirls. This takes a very steady hand. It was a bit difficult trying to keep the lines perfect. I had to go
over the swirls a few times to fix my mistakes.

The last pumpkin I decorated (and my favorite) is the teal and white fall pumpkin. I did not measure anything on this pumpkin, I simply eyeballed it and did the best I could to make everything line up perfectly. I applied 2 coats of the teal. I also free handed the letters.

These are just a few of the many ways you could decorate your pumpkins. There are so many different ideas that you could find on Pinterest as well. Don’t be afraid to try something new!

Pumpkin Cupcakes with Cream Cheese Frosting


Things you will need :
Cupcakes:
1 5/8 c. All-Purpose Flour
1 tsp. Baking Powder
1/4 tsp. Baking Soda
1/2 c. Brown Sugar
1 tsp. Cinnamon
1/4 tsp. Nutmeg
1/4 tsp. Ginger
7/8 c. Pumpkin Puree, canned
1/4 tsp. Salt
2 large Eggs
1/2 c. Canola Oil
Frosting:
8 oz. Cream cheese
1/2 c. Butter
1 1/2 tsp. Vanilla
2 3/4 c. Powdered Sugar
Directions:

Get all of the ingredients that you need.

Then preheat the oven to 350 degrees.
In a mixing bowl mix together flour, baking soda, baking powder,                                                                                                                                           ssalt, cinnamon, nutmeg and ginger, for about 20 seconds. Set aside.
In an electric mixer using the whisk , whisk  together, Granulated Sugar and Brown
sugar and make sure there are no lumps.

Add canola oil to the sugar mixture and use the paddle attachment and blend mixture on medium high, until well blended.


Mix in the pumpkin puree and the vanilla, at low speed, mix in eggs one at time.

Once everything is all well mixed in, add that flour mixture that you have sitting aside waiting to be used!


Then divide the batter up into 12 cups on the cupcake pan! 3/4 full and
then bake at 350 degrees for 20 - 24 minutes.

Once the oven goes off use a toothpick to test the cupcakes.
Now for the cream cheese frosting. Whip together the room temperature cream cheese and butter, until smooth and fluffy. And add the powdered sugar and vanilla until light and fluffy.
Fall Fun

Need a cute fall decoration to spruce up your plain wall? Or just a fun craft to do. Well, I have the thing for you. The perfect fall decoration that is easy and fun to do. A decoration full of fall colors, a fun quote, and pure fall. Personally my favorite season. Season of jumping in leaves, sweater weather, hot chocolate, and crafty nights snuggled in blankets. It’s time for you to get your creative juices flowing.

IMG_7620[1].JPG
Supplies: IMG_7440[1].JPG
  • canvas (any size)
  • brown paint
  • red paint
  • orange paint
  • yellow paint
  • little brush
  • medium brush
  • fake leaves
  • hot glue gun
  • water to clean your brush
  • pencil

First take your canvas and start painting it. Red, yellow, and orange are to be used in this
step, not brown.


You want to blend the colors together so it looks like fall colors intermixing. You can do this by putting all three colors on your brush at the same time.

IMG_7458[1].JPGIMG_7452[1].JPG
When the canvas is covered it should look something like this. All colors mixed on the canvas. Also do not forget to paint the sides of the canvas as well.

IMG_7465[1].JPG
IMG_7467[1].JPG
The next step is to place your leaves where you want them so you know how to space out your quote.Then start penciling your quote so you can get it perfect before you paint the quote on.

IMG_7520[1].JPGIMG_7519[1].JPG
Next is to take your small brush and brown paint and trace over your quote. You can use whatever fall quote your would like too. You may need to do two layers for the quote.

IMG_7531[1].JPG

When you finish tracing you are set to decide where to hang your beautiful, crafty, new fall decoration. WOAH! But don’t forget to let it dry before you hang it up!

IMG_7620[1].JPG


How to Create an Unique Pop-Up Card
By: Nicole Lavelle

My mom’s birthday is coming up soon and if you’re anything like me, I am horrible at giving presents. It doesn’t help that my mom always says the same thing year after year- “You don’t have to get me anything!” She is also impossible to buy for. She doesn’t wear makeup or jewelry, doesn’t like clothes, is terrible at gardening, and always says she doesn't have time for hobbies, like reading or playing sports. This leaves me hopelessly searching Pinterest for a new idea for a present. The one thing she told me after I had asked a million times what I should get her is that she wants something to keep, cherish, and remember, is homemade, and from the heart. This made me think of creating a nice card for her.
Ever since I was little, I had a knack for making cards, although I stopped once I grew older and thought arts and crafts were only for kindergarten students. With an optimistic attitude, I decided to made a pop-up card to show how much my mom means to me. If you are ever scrambling to put together a last minute gift, remember that a homemade card can be just as satisfactory as a store bought present. I’m going to show you a fast and easy way to show your appreciation of someone you love in just five simple steps.   
Supplies Needed:
Construction/ Scrapbook Paper
Scissors
Pens or Markers
Glue Stick
Ruler (Optional)
Stickers (Optional)

1. First, gather your supplies. I used scrapbook paper and stickers that my aunt had given me a couple of years ago. All of the other supplies, I had stored in my desk.
Then choose a paper that will be used for the inside of the card.
2. After you choose a piece of paper, fold it in half the long way (hotdog bun style), making sure the pattern is inside.           
Then with your paper turned vertical, draw two horizontal, parallel lines that are about as long as 1/4 of the page on top of the paper. Next draw the same thing a space below, but this time have your lines measure as long as 1/3 of the page. Draw a third set of lines reaching to the middle of the page. The width between the lines is up to you. I measured the first set to be 1 inch apart, the second to be 1 1/2 inches, and the third being 2 inches. Make sure you are drawing the lines on the side of the paper that does not open.
 
Then cut the horizontal lines (not the vertical lines!!) with a scissors.
You can then push on those three sections and it should look like boxes are on your paper.
3. Next you can choose a paper to be on the outside of your card.  
Cut this paper to fit your other paper. I made my cover a little bit bigger so the inside would have a border.
  
4. For the next step, you can decorate the cover of your card. I used stickers that surrounded the center of the card and a pen to write Happy Birthday in the middle.

5. Next, I decorated the boxes on the inside of the card to look like presents. I found pieces of paper with different designs on them, cut the papers to the size of each box, and used a glue stick to glue the “wrapping” to the box. I also found some ribbon and a bow. I used it on the second section, gluing strips of ribbon on each side with the bow above one ribbon.
I used to stickers to spell out Happy Birthday. Pens or markers could also work.
The very last thing I did was sign my name!
I hope you enjoyed creating a festive card. I’m sure the receiver will love it!


Fall Bucket List Items to Check Off
By Emma Berndt

Sometimes, fall can come and go before we even realize it was here. The weather is hot and muggy one day and then the next day you notice all the leaves have fallen to the ground and the days have gotten much shorter. Pretty soon winter intrudes into the picture and it is a long time before the grass even emerges again. To take advantage of those crisp fall days before they’re gone, I have come up with a bucket list for fall that will help you make the most of these gorgeous days.

  1. JUMP IN A PILE OF LEAVES. Release your inner child with this super fun idea. All you have to do is rake up a pile-the bigger the better-and start running at it. Although they probably won’t erupt and flutter around you when you land in it like they do in cartoons, it is still satisfying to hear the leaves shift beneath you and have a soft landing pad in the middle of nature. You can even take pictures while you’re at it and have a cool photo shoot. This idea is something that you just have to do each fall, it is so much fun and even a good way to get a little exercise in!
www.123rf.com                                                                                   www.irishisanattitude.com

2. GO ON A HAY RIDE. For this idea, you might have to keep your eyes open for a farm and city days or a fall gathering around you if you don’t have a tractor. Usually, you should be able to find a community near you that has fun activities going on. If you do have a tractor and a trailer you can set up some hay bales with  blankets on them and invite your friends and family over. Plan a route ahead of time that will show off some beautiful sites and if you’re feeling ambitious, you could even prepare some hot apple cider for your passengers. There’s just something about feeling the wind brush the hair off your face and breathing in the crisp fall air that never gets old.
Sites.psu.edu

3. PICK APPLES. Gather some friends and go apple-picking. Everyone knows that food tastes better if you did the work either picking it or preparing it. Apple picking is generally fairly cheap and you can be sure that the apples are organic rather than doused in nasty chemicals. Picking apples from the trees is so much fun and it is a lot different from just grabbing apples from their display at the store. Also, apple-picking is great for kids so they can get a sense of where their food comes from. Lots of times, kids don’t realize that their food doesn’t actually come from a grocery store. It is important to understand the process that food goes through to get to the store and your plate. Once you gather all the apples your heart desires, you can go home and make apple crisp, apple pie, or apple strudel (or anything else of course).

www.fastgrowingtrees.com

4. CARVE PUMPKINS. Carving pumpkins serves two purposes: you have cool decorations for Halloween and you can eat the seeds you dig out. You can be as creative as you want, you could carve a mummy, witch, cat, pirate, or ghost just to name a few. You could also decorate the pumpkins by painting them or using spray paint to add a touch of glamour to them. Last year, I spray painted some pumpkins gold and then took a sponge and added white polk-a-dots to a few. When you put them out for decoration, a fun idea to do is to use a string of Christmas lights and place them through the pumpkins. When you plug the lights in, there will be a soft glow coming from the pumpkins that will instantly add a cool effect that people will be in awe of. This is a great activity to do with your friends and family and you get to admire your handiwork for as long as they last.


www.grandparents.com                                                                      
  www.countryliving.com

5. TAKE A DRIVE AROUND. There is no prettier time in nature than in fall. The leaves are red, orange, yellow, brown, and mixtures of all those. Driving around and soaking up the beautiful scenery is one of the best ways to appreciate fall. The best fall time drives are when the sun is shining and the leaves are slowly falling down and the roads are clear. It might even be a good idea to take some breaks while driving and get out and get some pictures and just soak in the view. You can listen to the radio with the windows down and just appreciate the beauty of mother nature. It can be a very soothing experience.


www.onbetterliving.com

6. Have a Halloween Party. Whether you’re young or old, it’s never a bad idea to invite some people over for a Halloween party. You can have so much fun decorating and coming up with fun games and food ideas. In fact, I think preparing for a Halloween party is almost more fun than the actual party itself. If you look on Pinterest, there are a boatload of ideas on how to make food look sinister and creepy, or it could look cute and fun. One idea for food is to make rice krispie bars dyed with orange food coloring and then shape them into balls and add a touch of green frosting at the top to make them look like pumpkins. For game ideas, you could do pin the hat on the witch, have a costume contest, or go bobbing for apples. A perfect end to your night would be to stay up late watching scary movies to get everyone excited about the upcoming holiday. Chances are, your guests will remember your party for a long time and it will be quite an enjoyable experience for everyone.
www.heritage.com                                                                                     www.food.com

Hopefully this list inspired you to get out and get moving before any more of the precious season of fall slips away. Maybe it also gave you some ideas on what else you could do to enjoy fall. Thanks for reading and until next time.