Thursday, November 9, 2017

Bring out the Pumpkin Cookies!


20EE0898-2CE8-453A-8BCF-64A175430FA1.JPG
Pumpkin, pumpkin, pumpkin and more pumpkin! Pumpkin food is just about the best thing out there, in my opinion at least. Around this time of year my family and I like to have some fun with the flavor trends that go on, so it is always a must to make a special treat! My favorite is pumpkin cookies! For this yummy treat, my lovely sister helped me whip some up. Come read along on our journey to making amazing pumpkin spice cookies!

E7D61CFA-EEBB-4BFD-814F-5F6A5F60BF89.JPG69DD3A98-5043-44CB-AFDE-92CB3FA43DA8 2.jpg
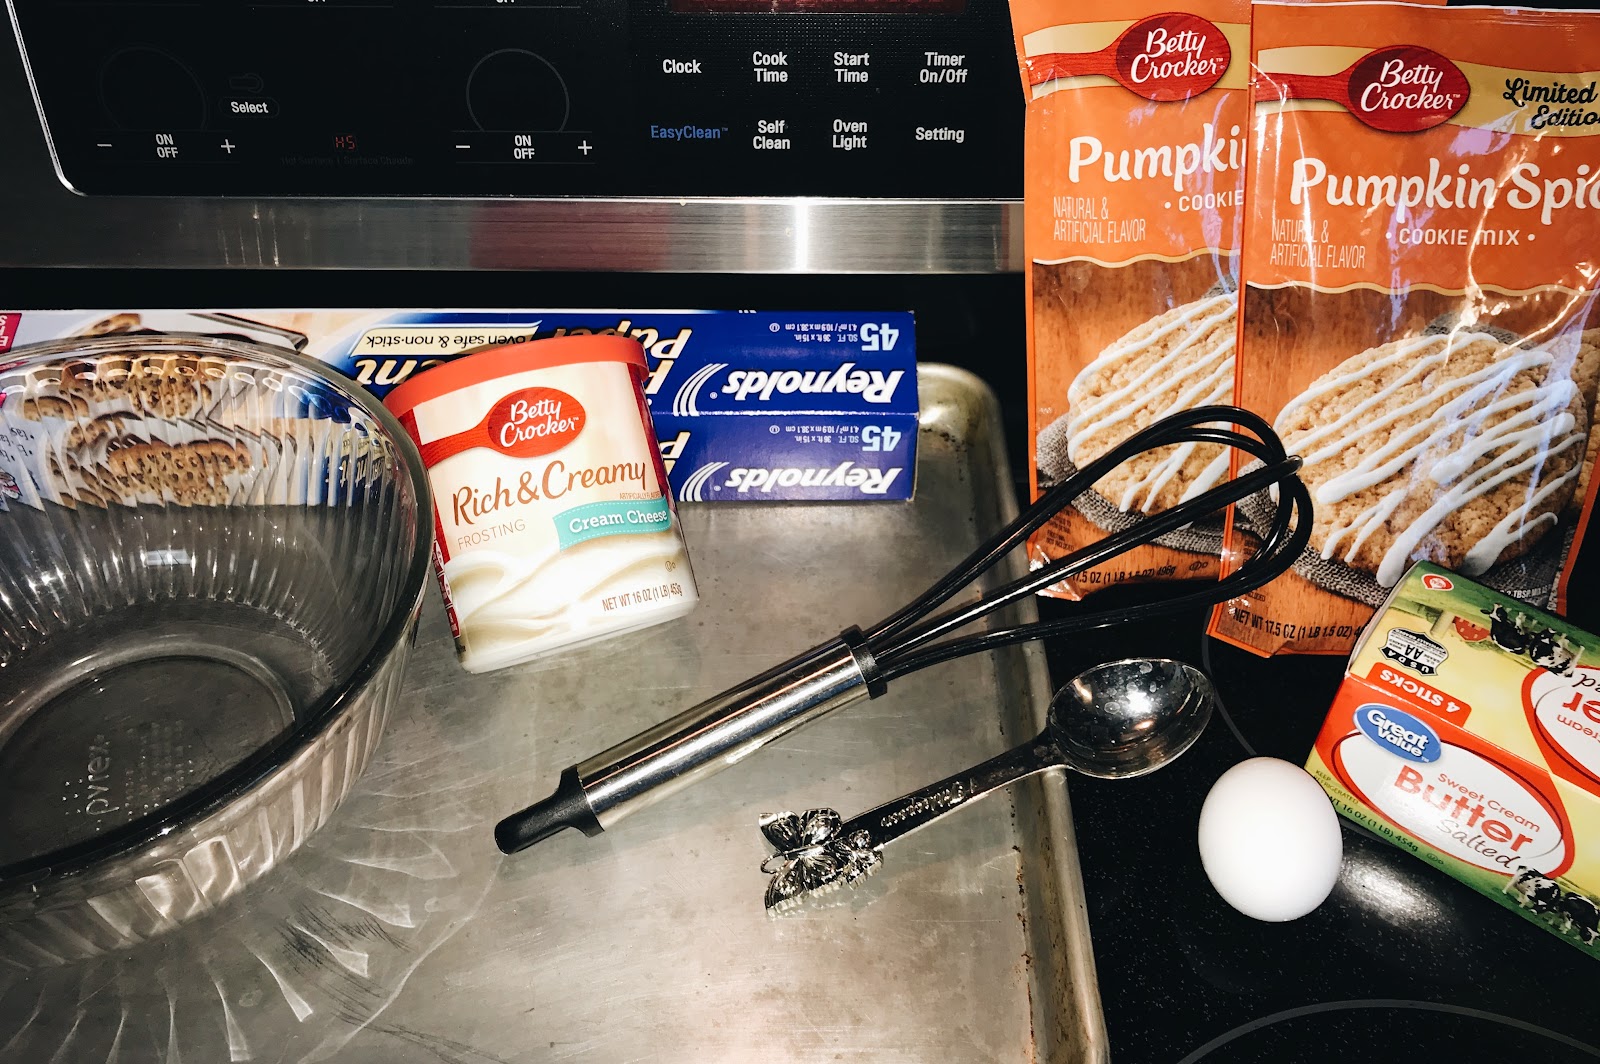
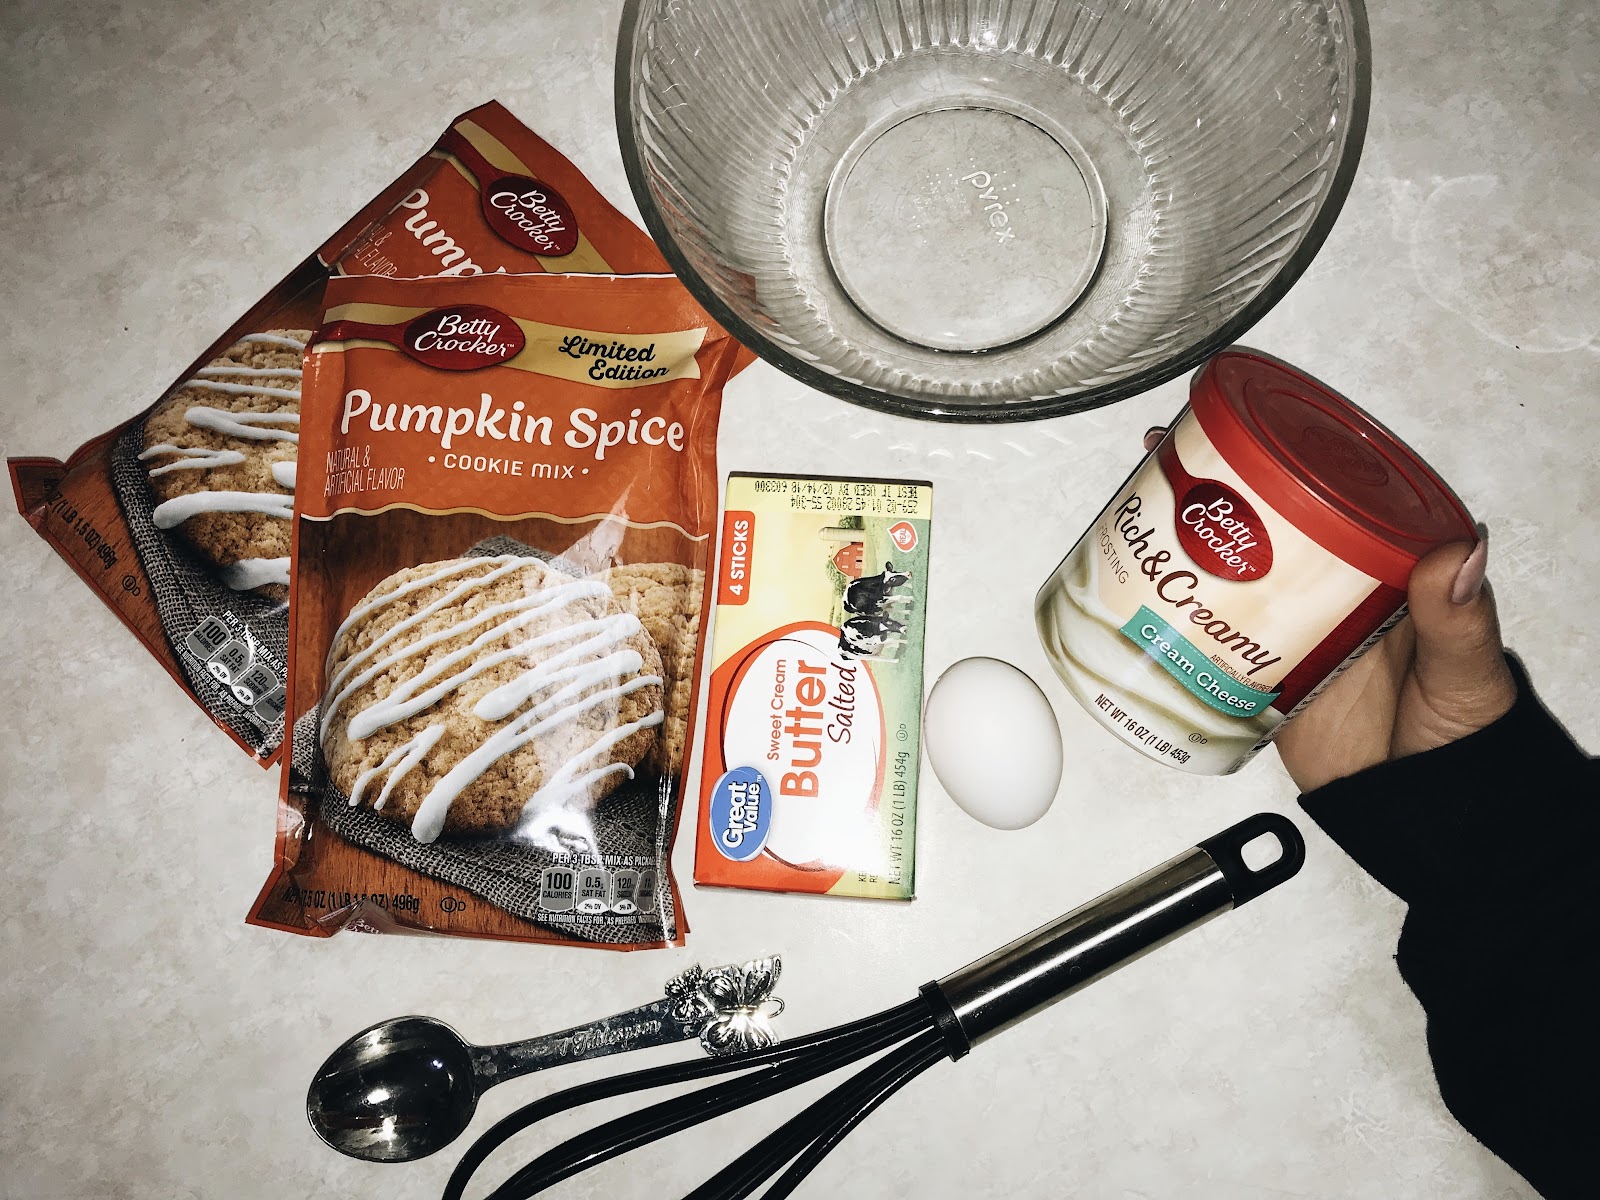
First step before the baking process is to gather all your ingredients. What you’ll need:
  • packet of pumpkin spice cookies
  • one egg
  • a stick of soften butter
  • cream cheese frosting
  • tablespoon
  • cooking whisk
  • cookie sheet
  • a non-stick baking sheet
  • large bowl
DFFB6C1D-B1B9-450A-9E98-9420E8F1DC48.JPG
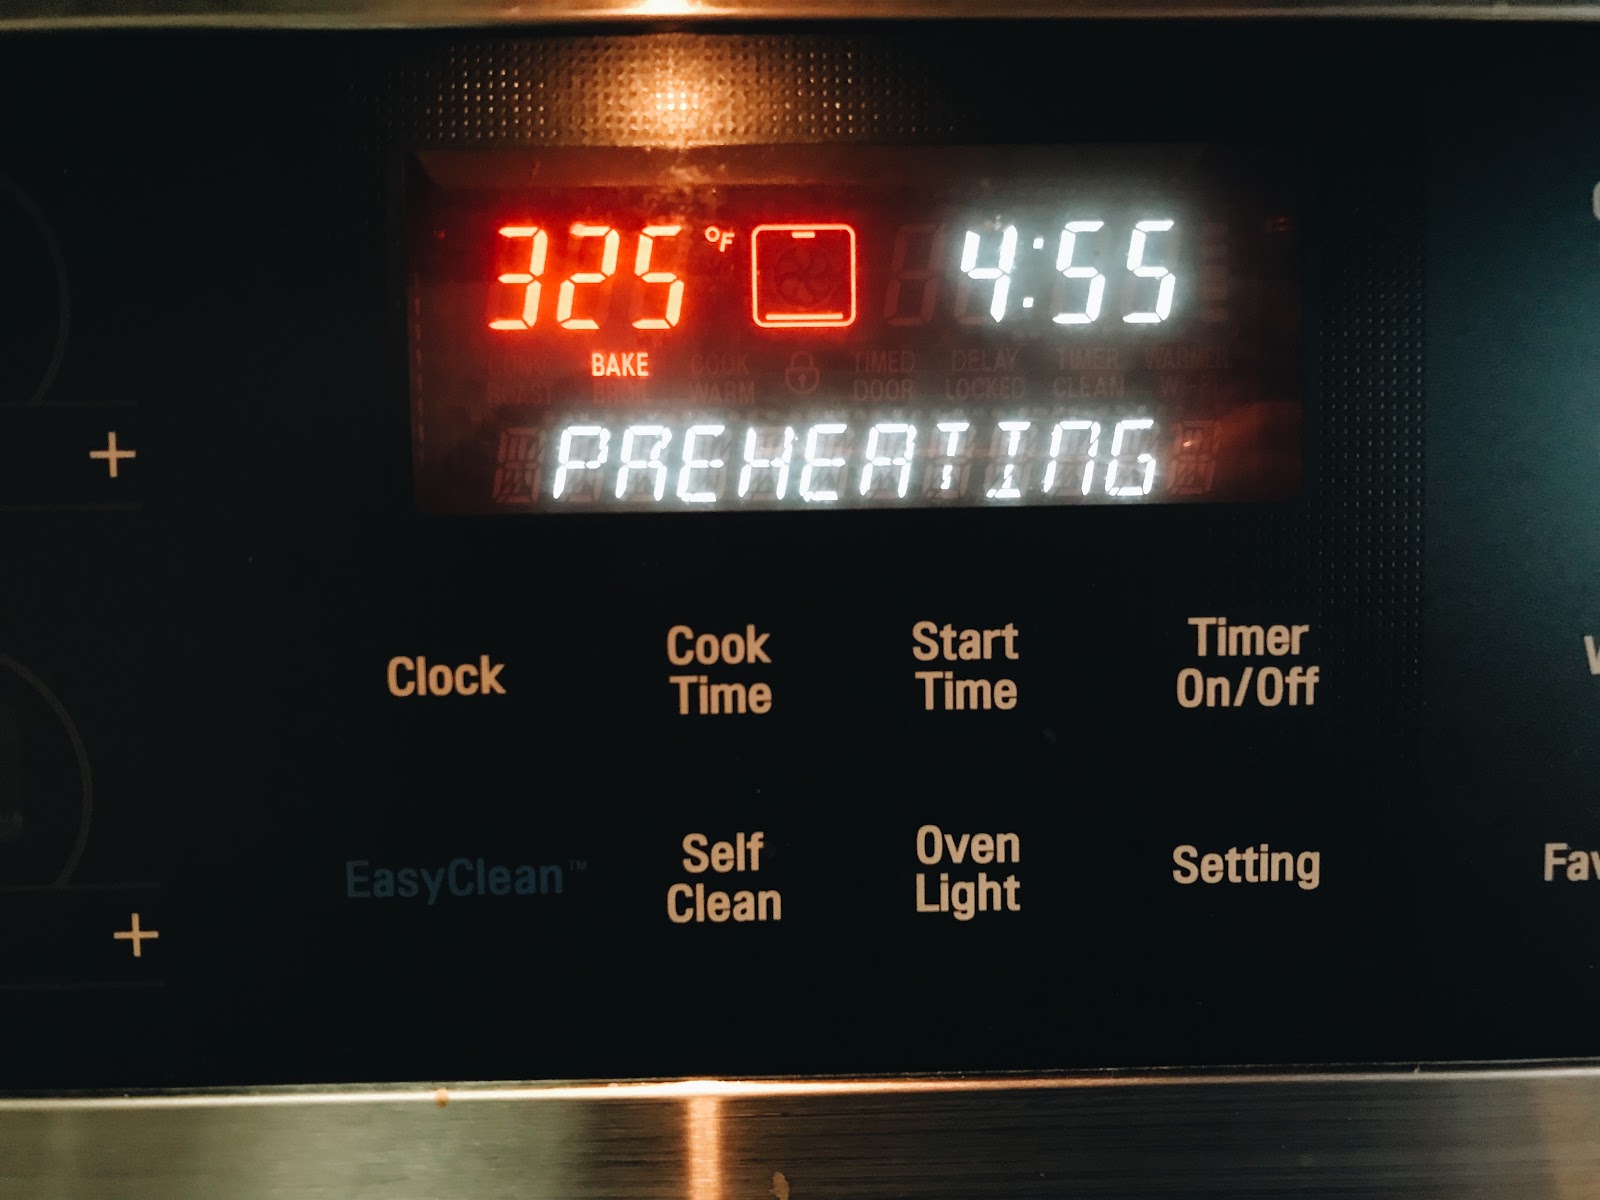
What we are going to do before any major steps is to preheat the oven to 375(F). This way when we are finished preparing our cookies, the oven will be ready to go.

3C46C1C0-A7C0-4C9A-B772-4016195AFE59.JPGA20DFE7D-AC69-4563-B524-1DA0D1349F93.JPGD6FDF968-F973-4589-A587-93BA43D4B686.JPGA5C84634-5540-494F-84D9-A72976B8E118.JPGA49E4E0B-CD03-40A7-A70F-05E668317F28.JPG
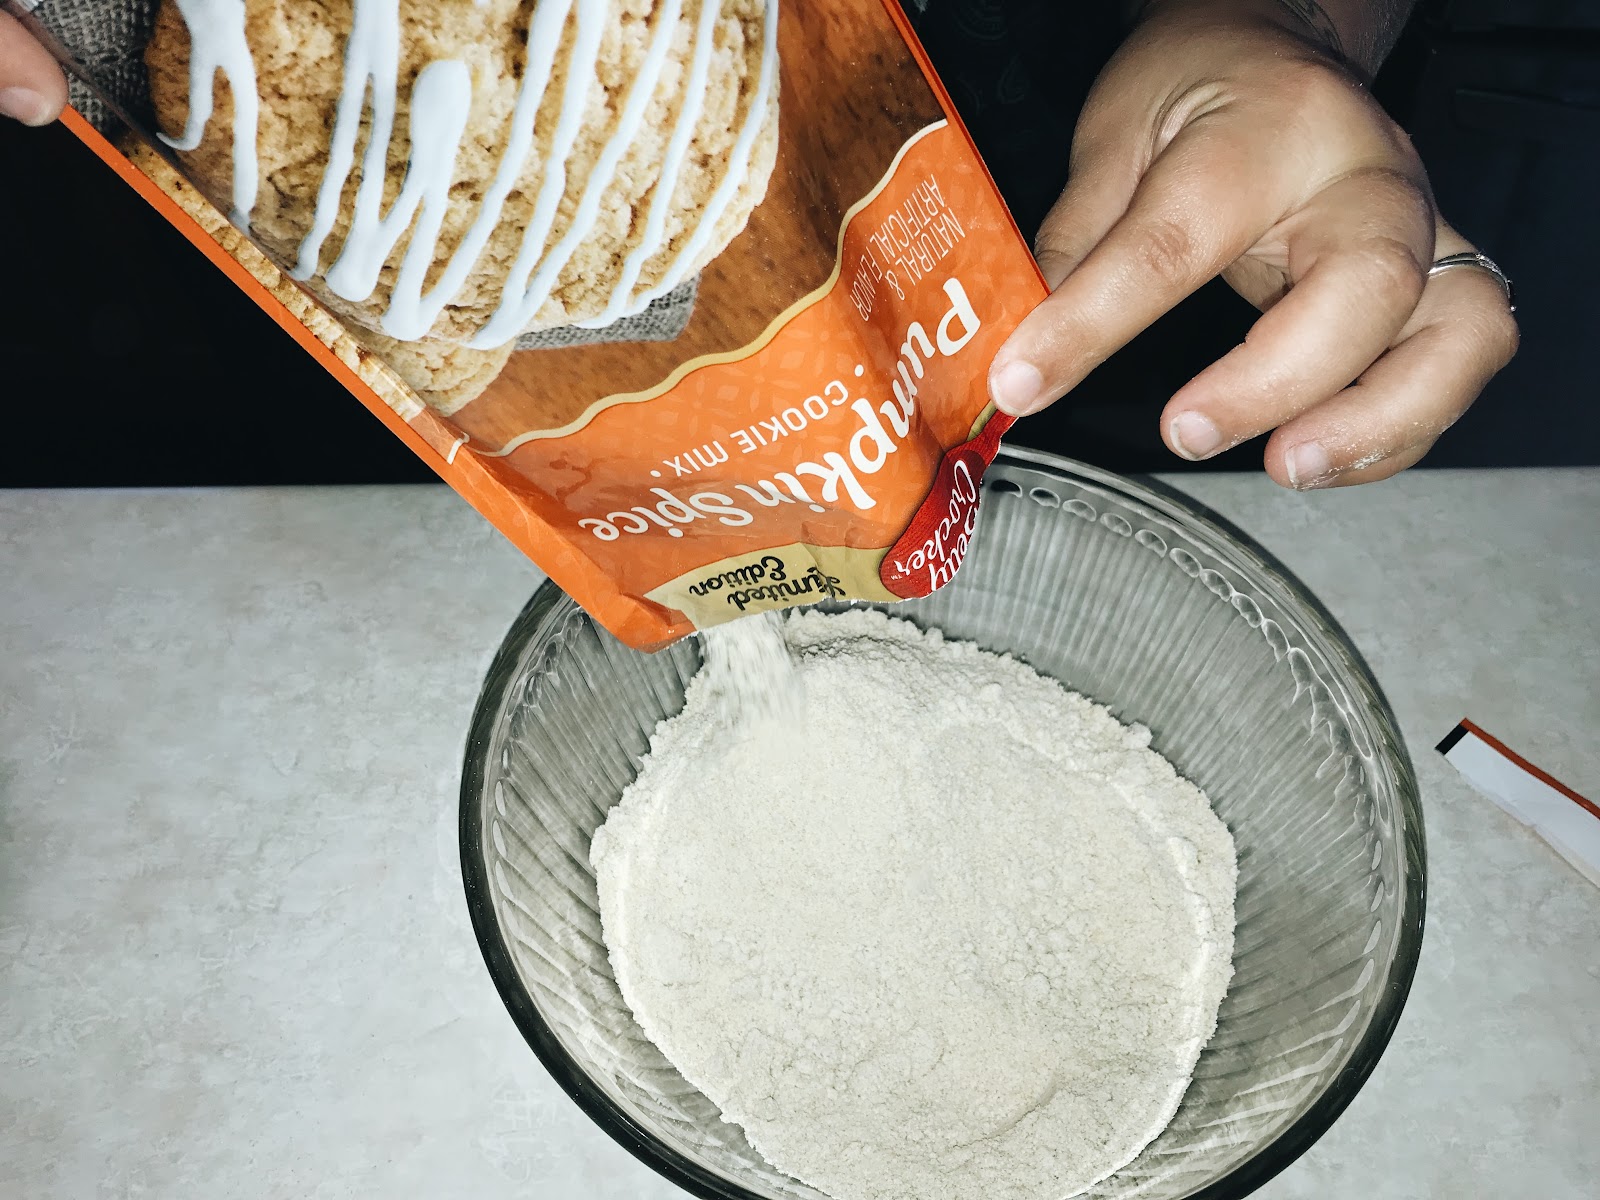
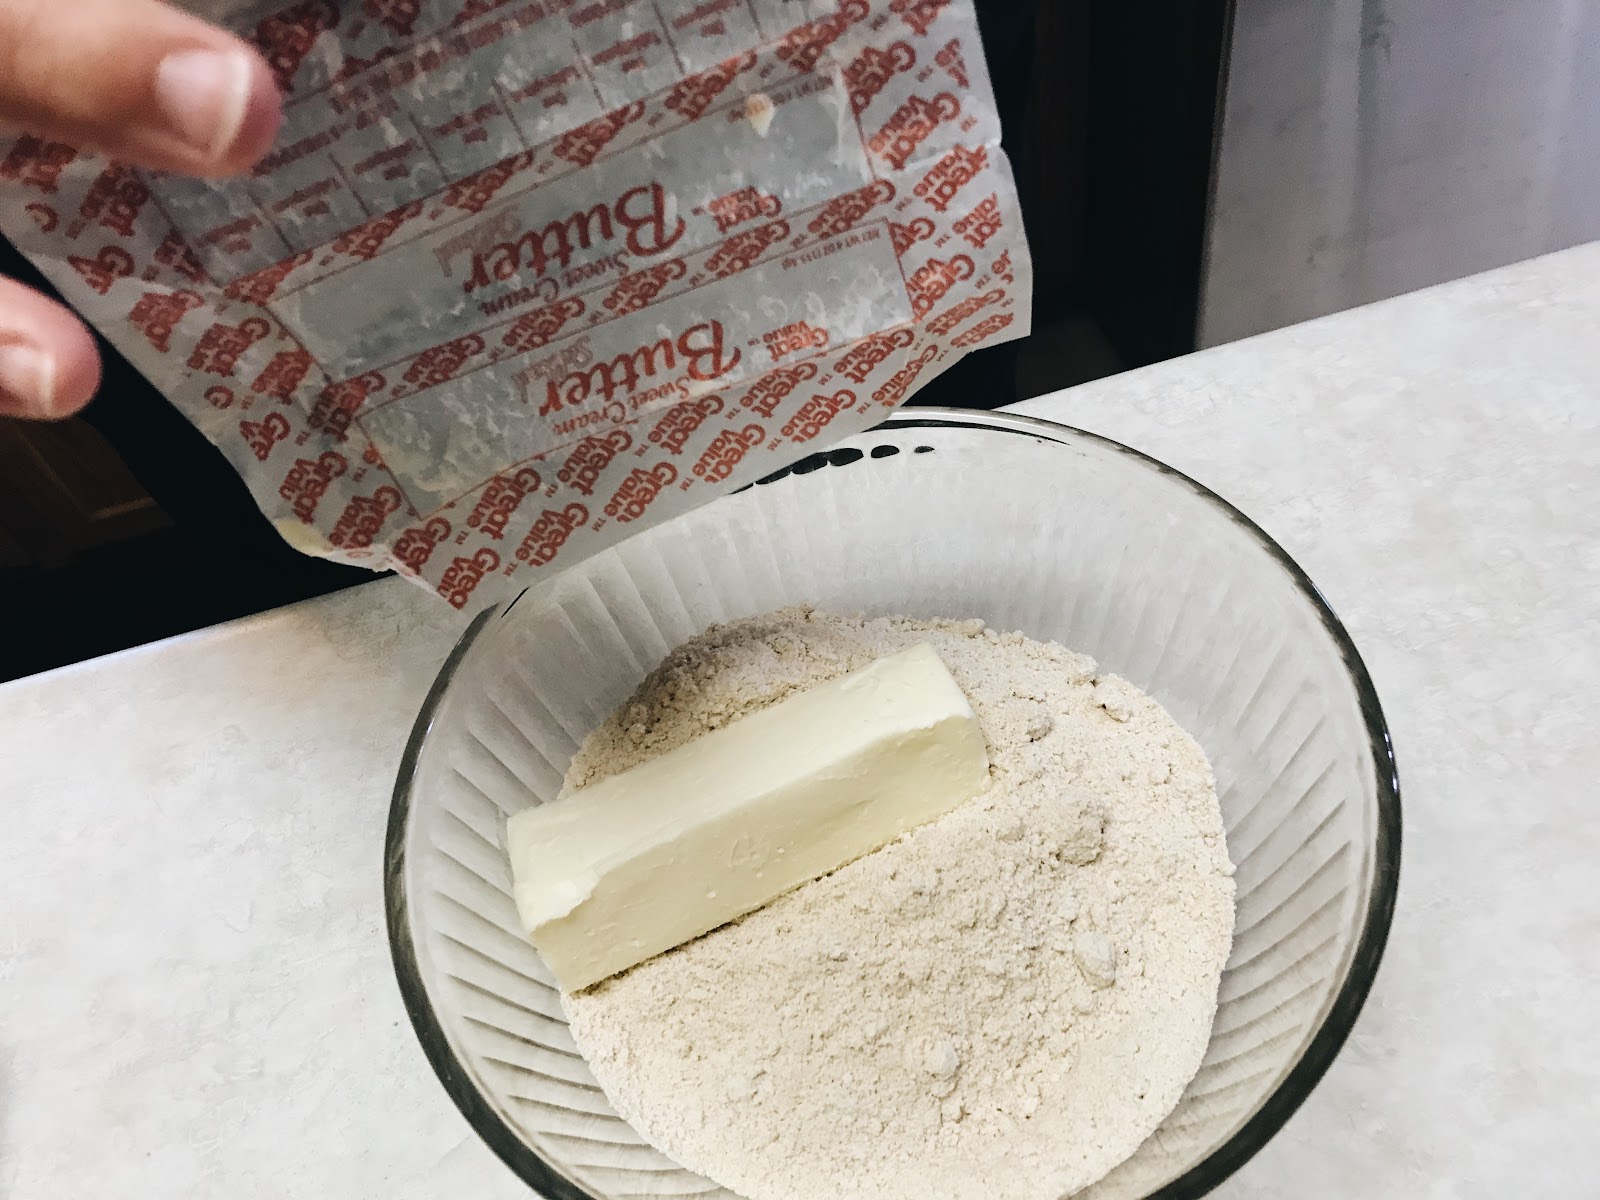
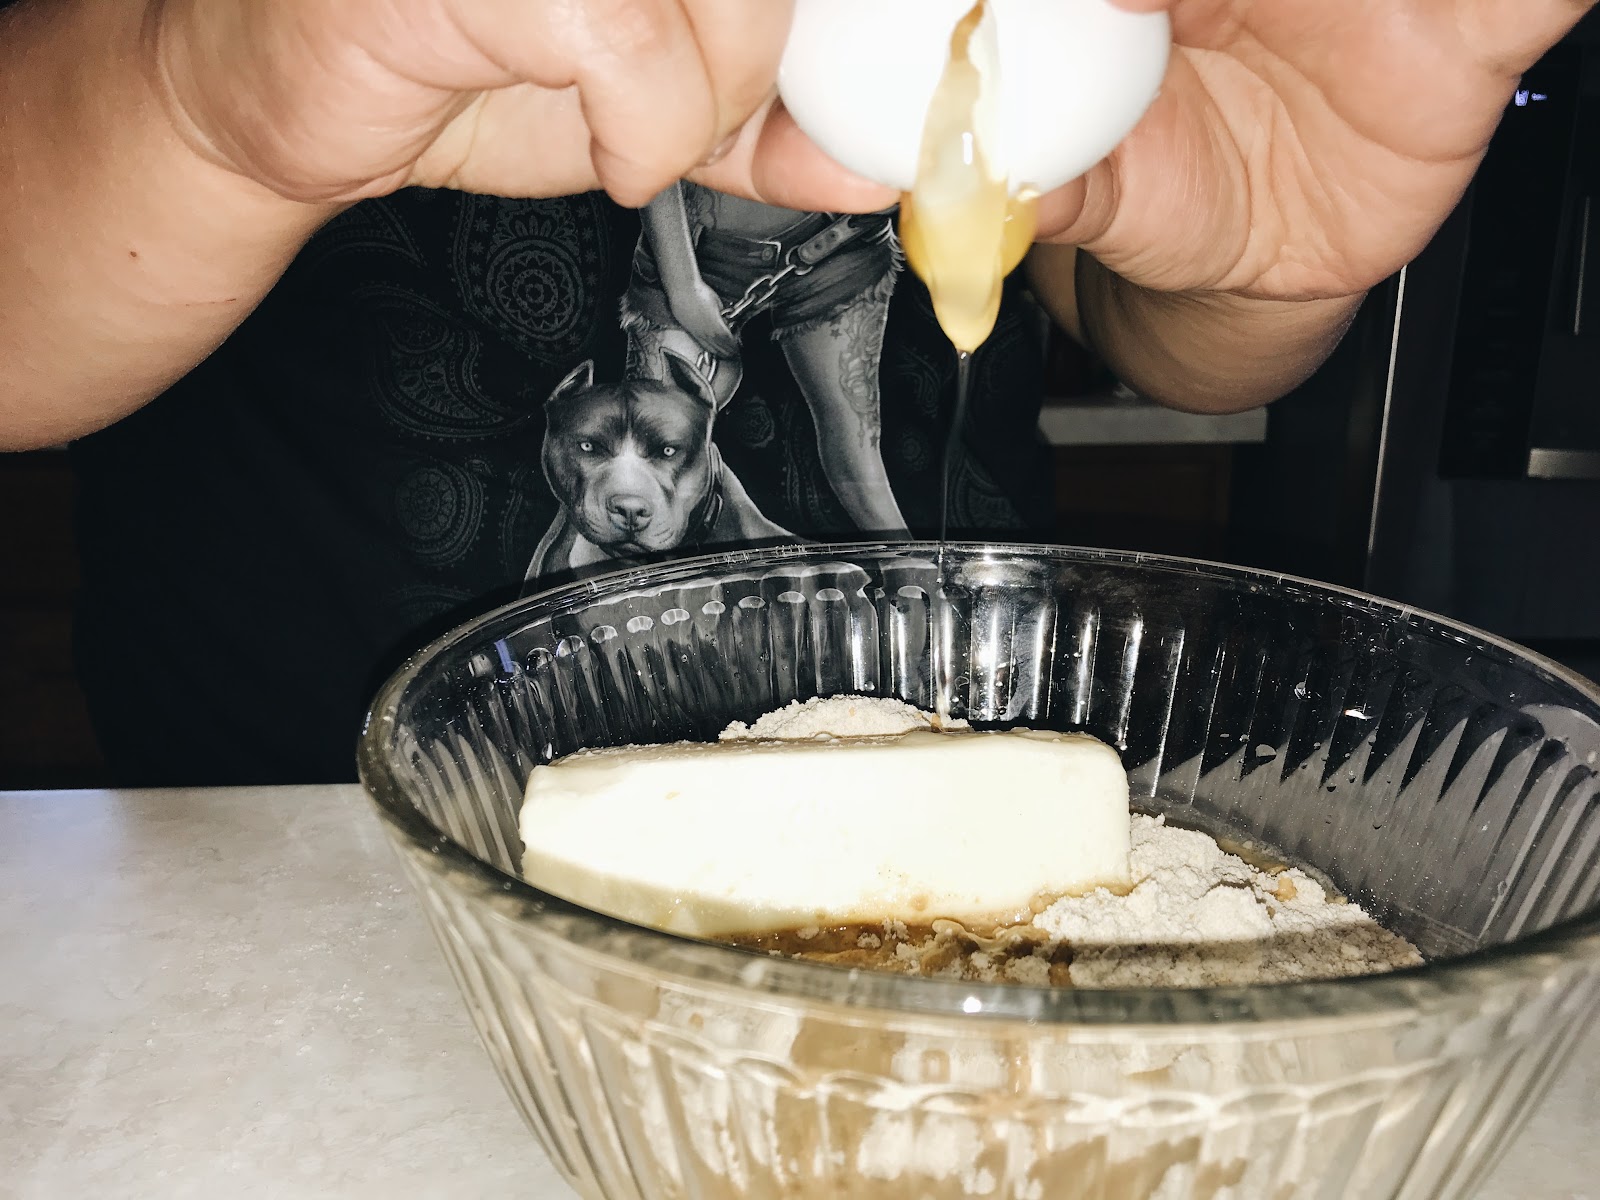
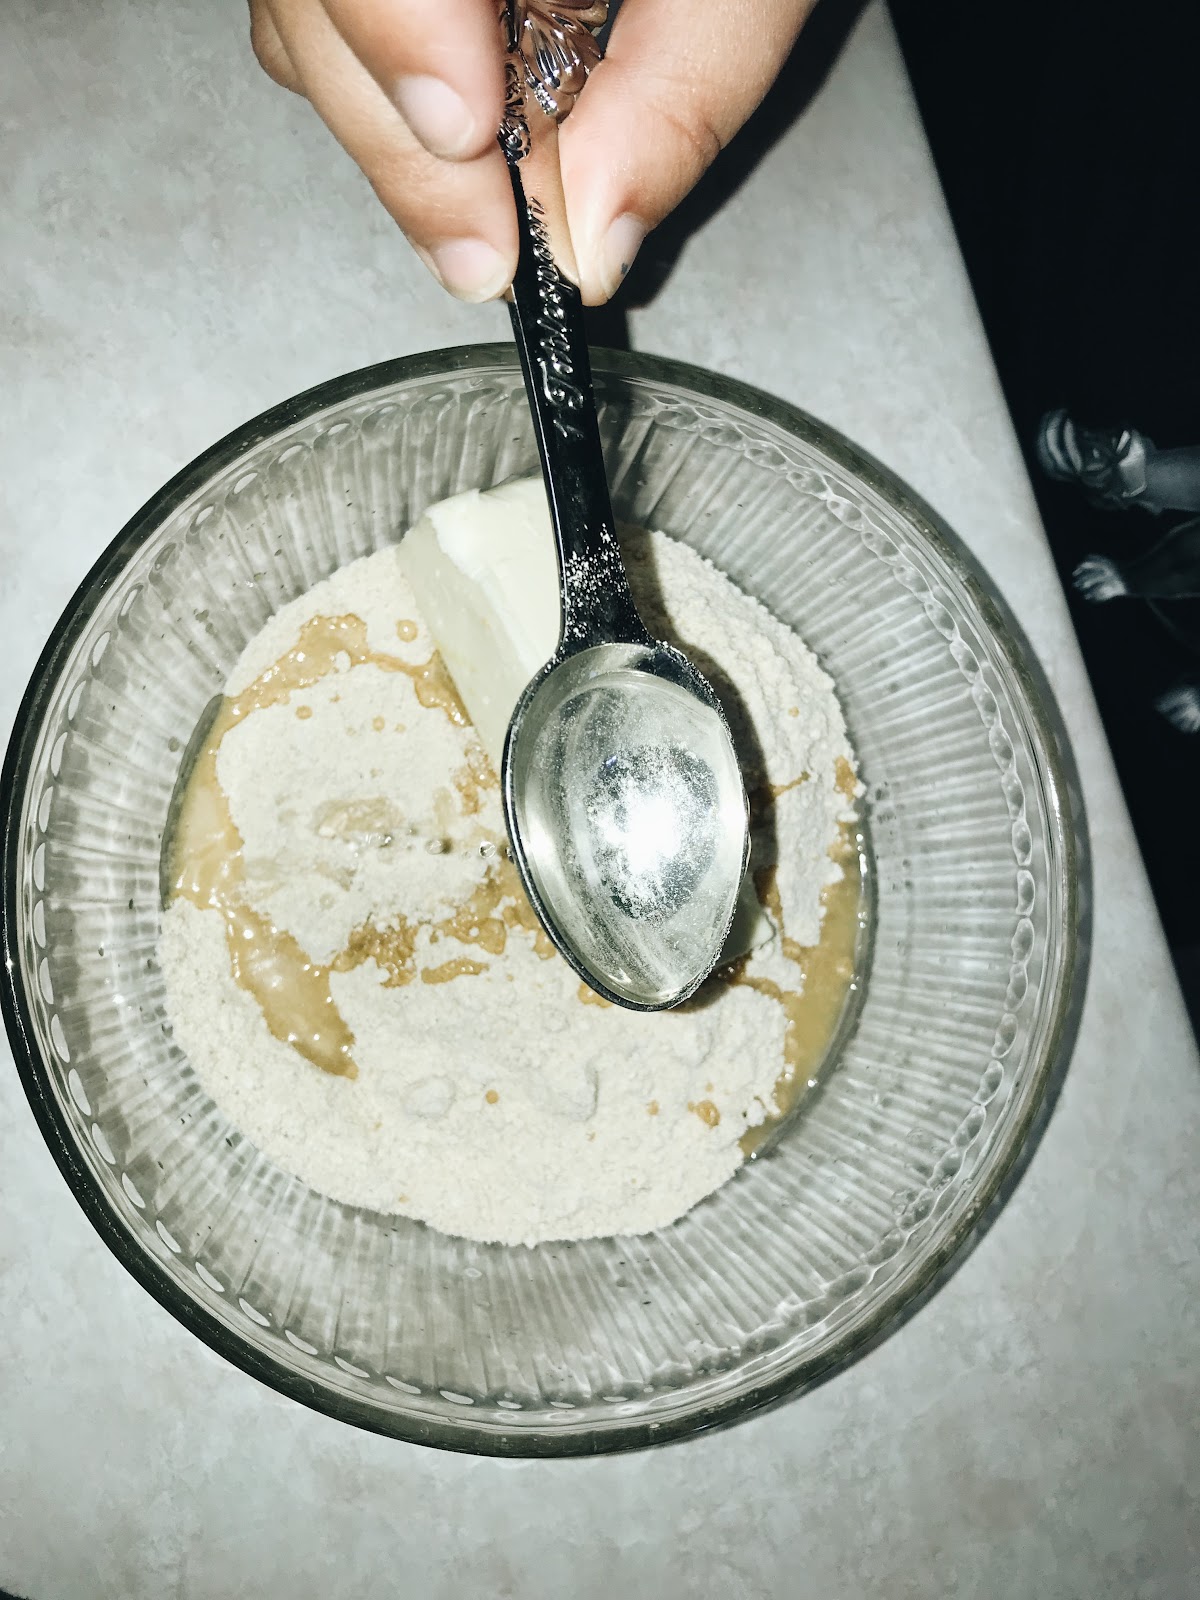
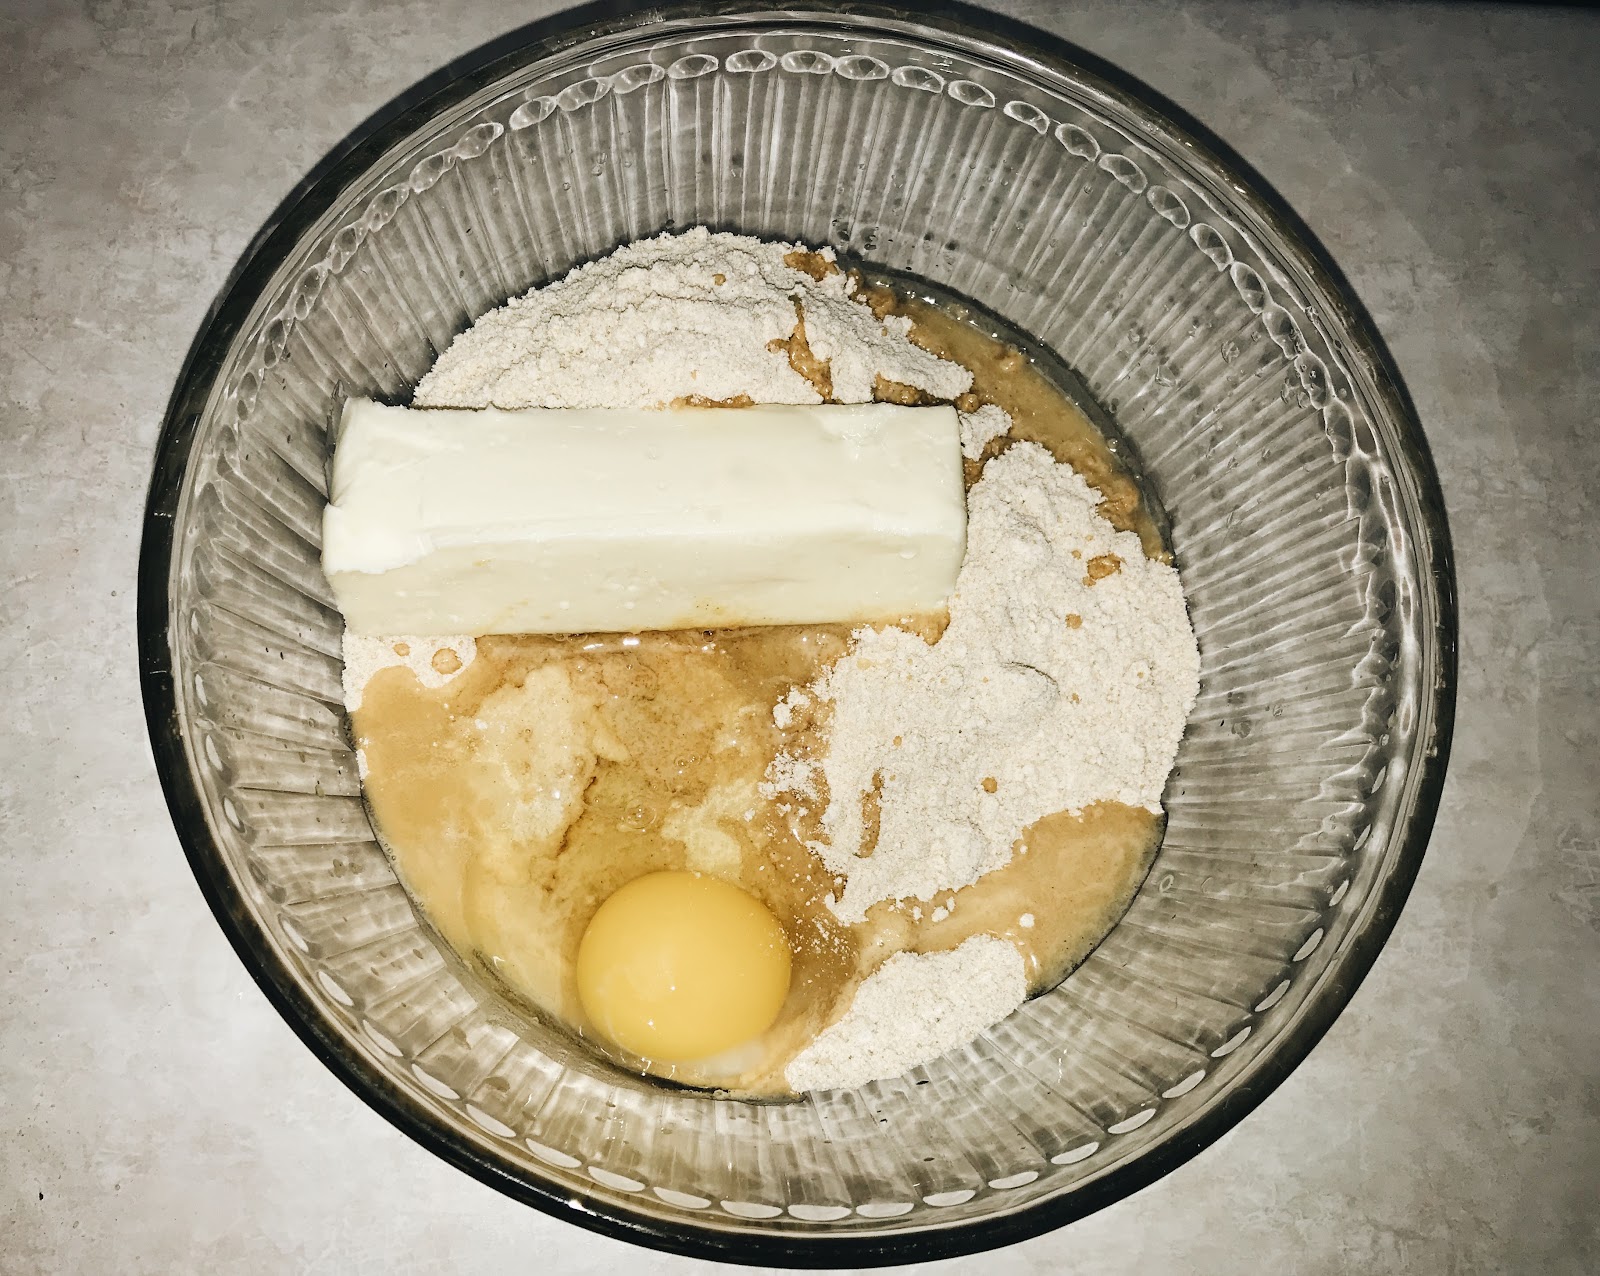
After we have those two steps out of the way it’s time to start creating yummy cookies! Start off by placing all ingredients together. Grab one of your packets of cookie mix and pour it into the bowl that was pulled out earlier. Pick up your butter and dump it into your cookie mix. Make sure your butter is soft enough otherwise when we begin to mix, it could get challenging. Go ahead and crack your egg into the combination. Lastly, you're going to want to take your tablespoon and fill it twice with water pouring it over top of the rest of our ingredients.


C8FE2E79-FC87-481E-8058-FA53D7878A5F.JPGED5F88E7-33F3-4CE5-8636-29C244220120.JPG
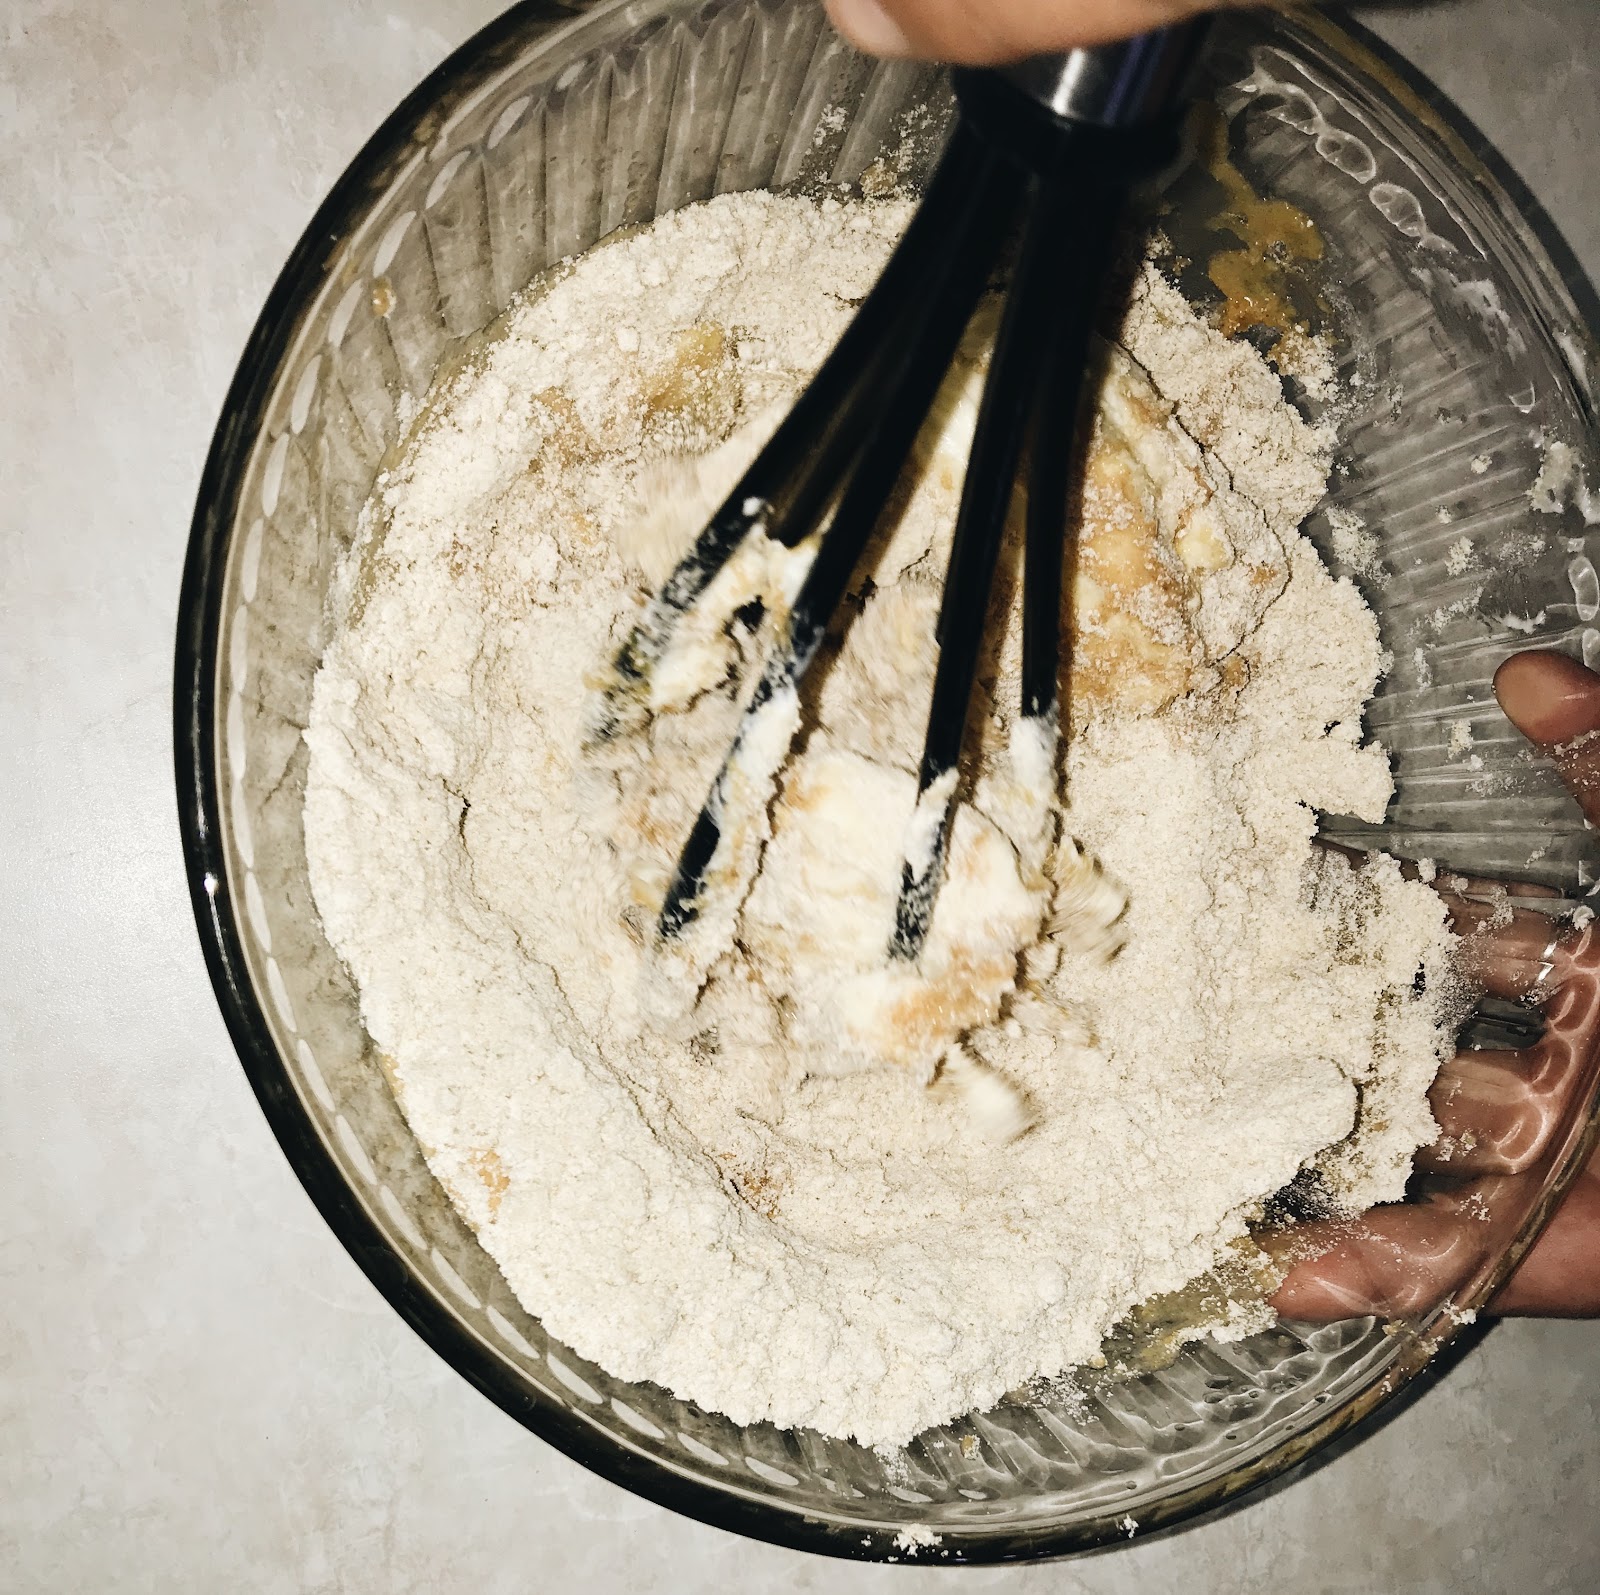
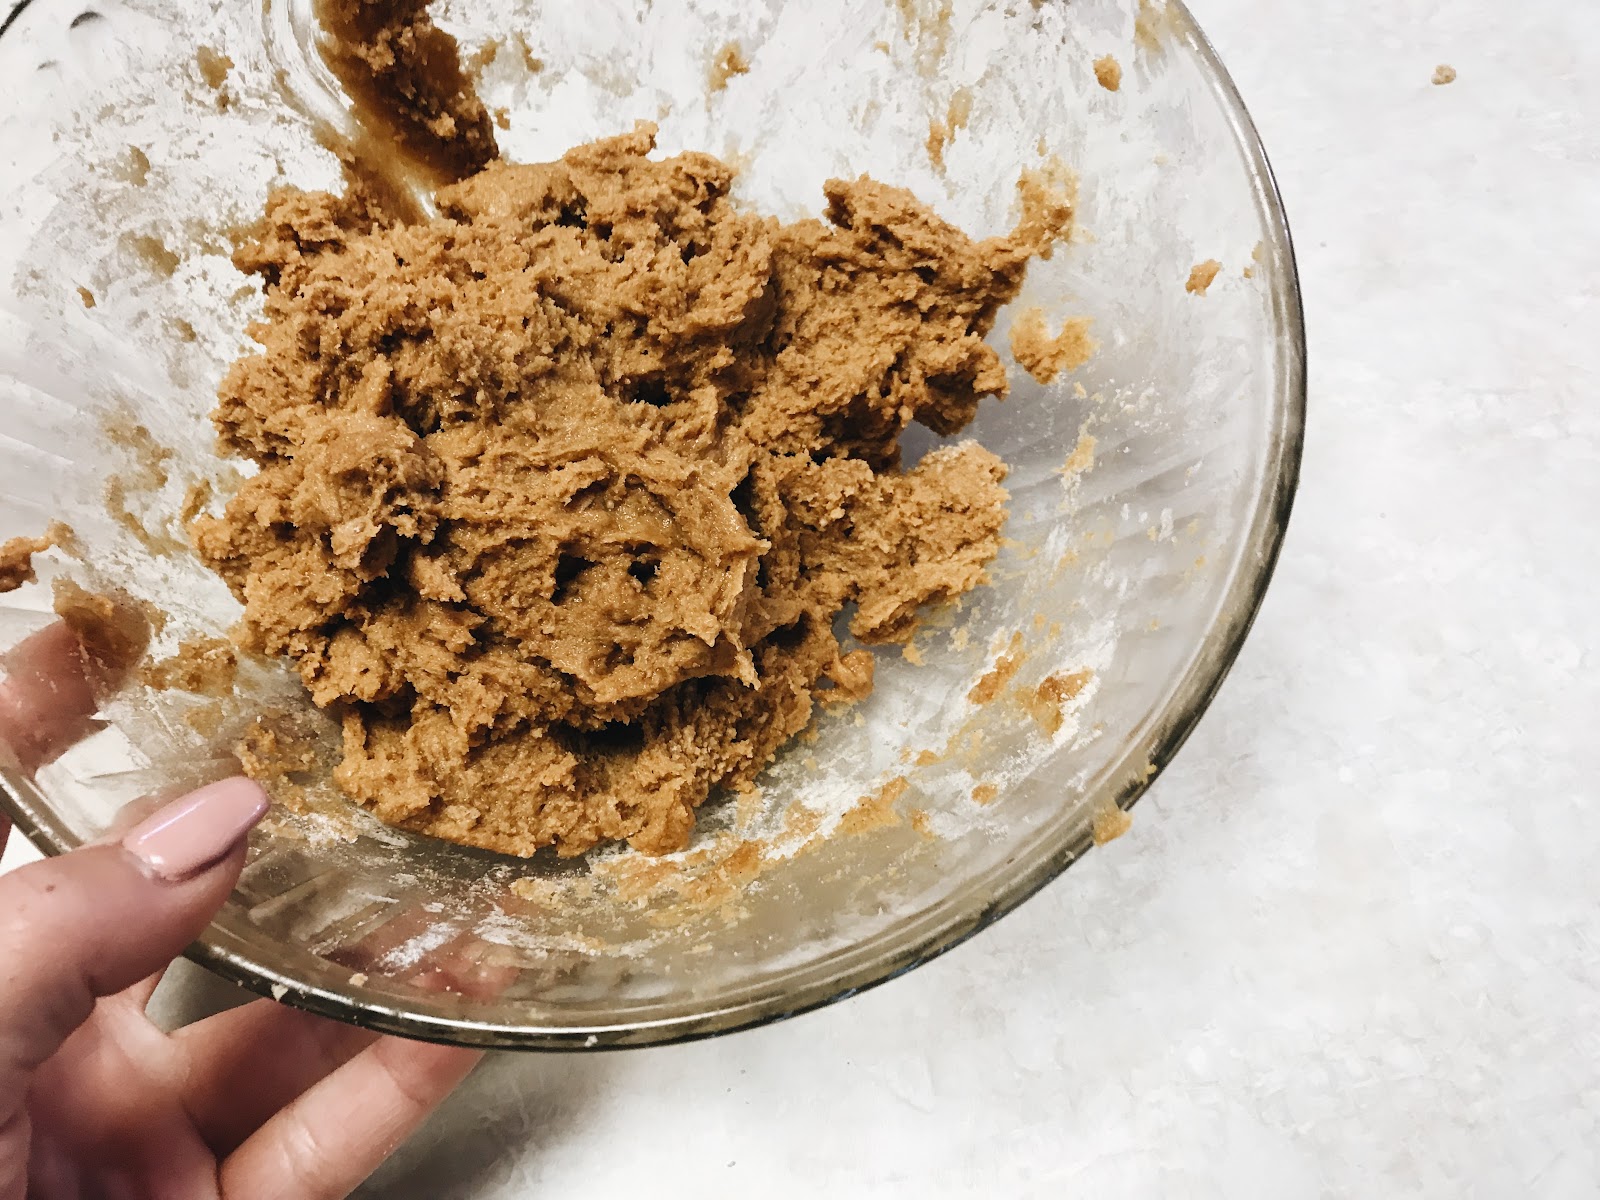
Fabulous! Once finished adding everything, go ahead with a baking whisk and mix together! This step may be a little difficult, just keep with it and eventually you will get a good mixture of cookie dough. If you have one, you can always use an electric mixture that may work better!

99A6C30A-0807-4BAC-B257-77943EE27F01.JPG198496C0-DE35-414C-95E9-972DFBC20B09.JPG
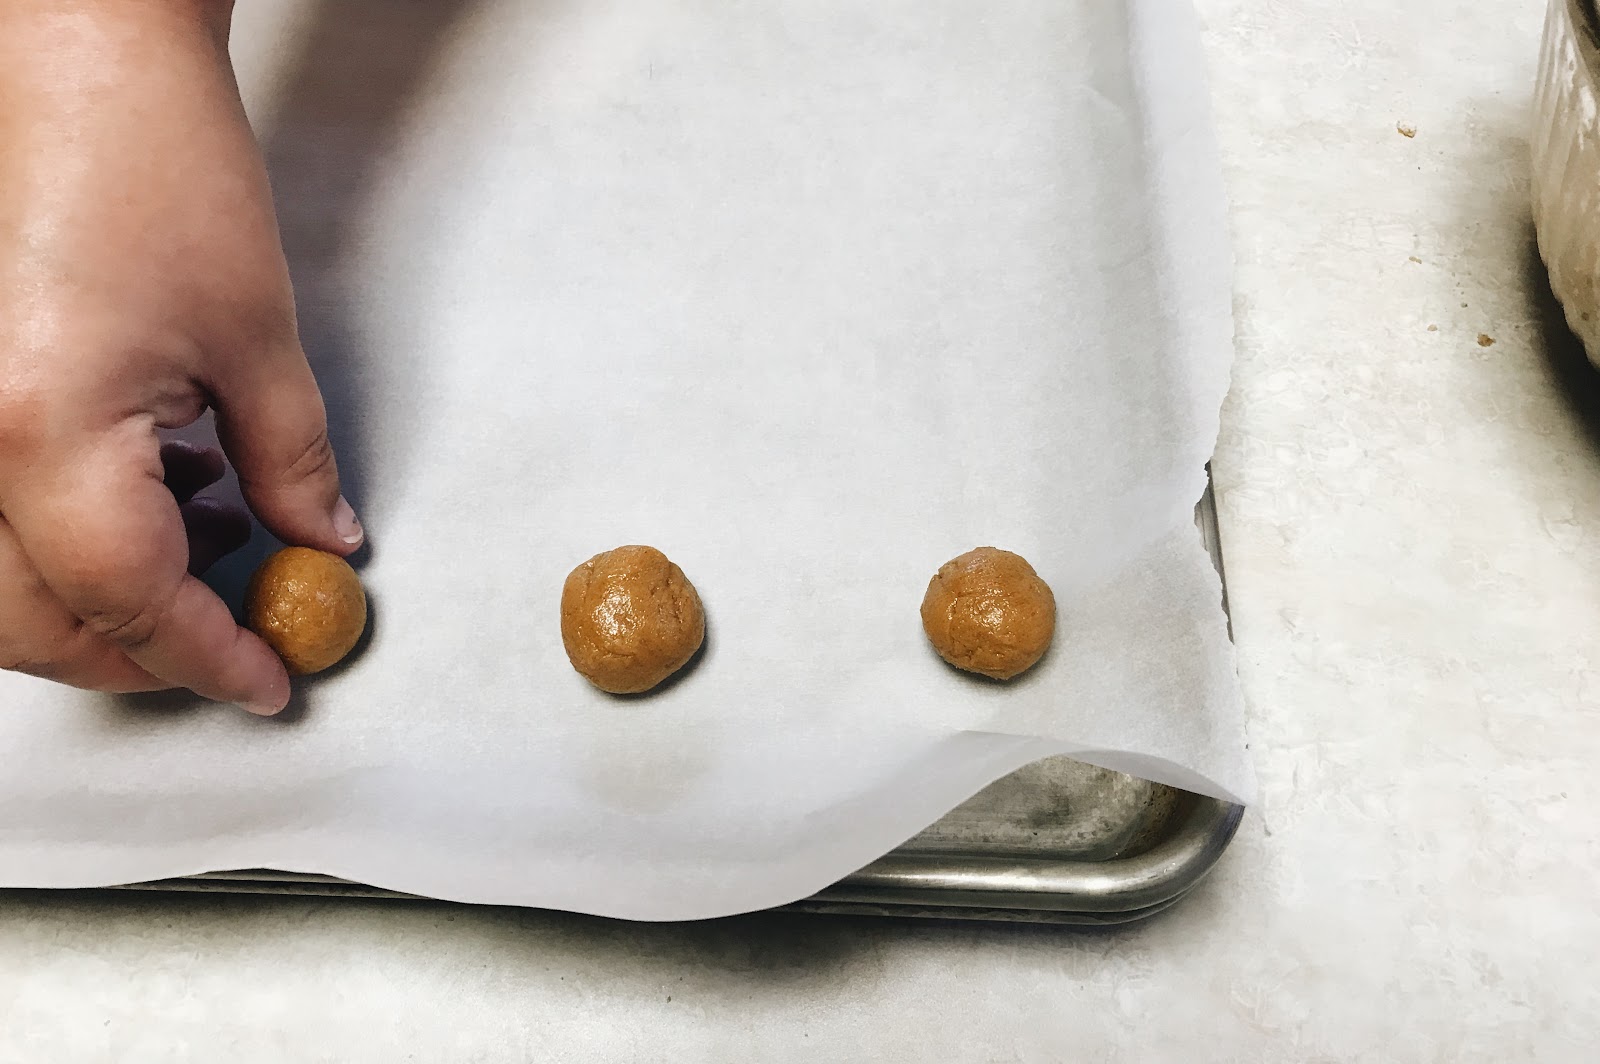
Now that we have our dough, we can go ahead rolling them up into little balls. Beforehand, I like to place the non-stick baking sheet over our cookie sheet to make for easier removal at the end or you can always spray a little bit of pam cooking spray down and that works just as well! To get a good size cookie, what helps is if you scoop it with a normal spoon and use that amount or you can go ahead and pick whatever size you like. Make sure when placing them on your sheet place them far enough away from one another so when you bake them they don’t run into each other as they expand.

5B85889E-8AB1-4C1B-9577-A91B003FB9C9.JPG

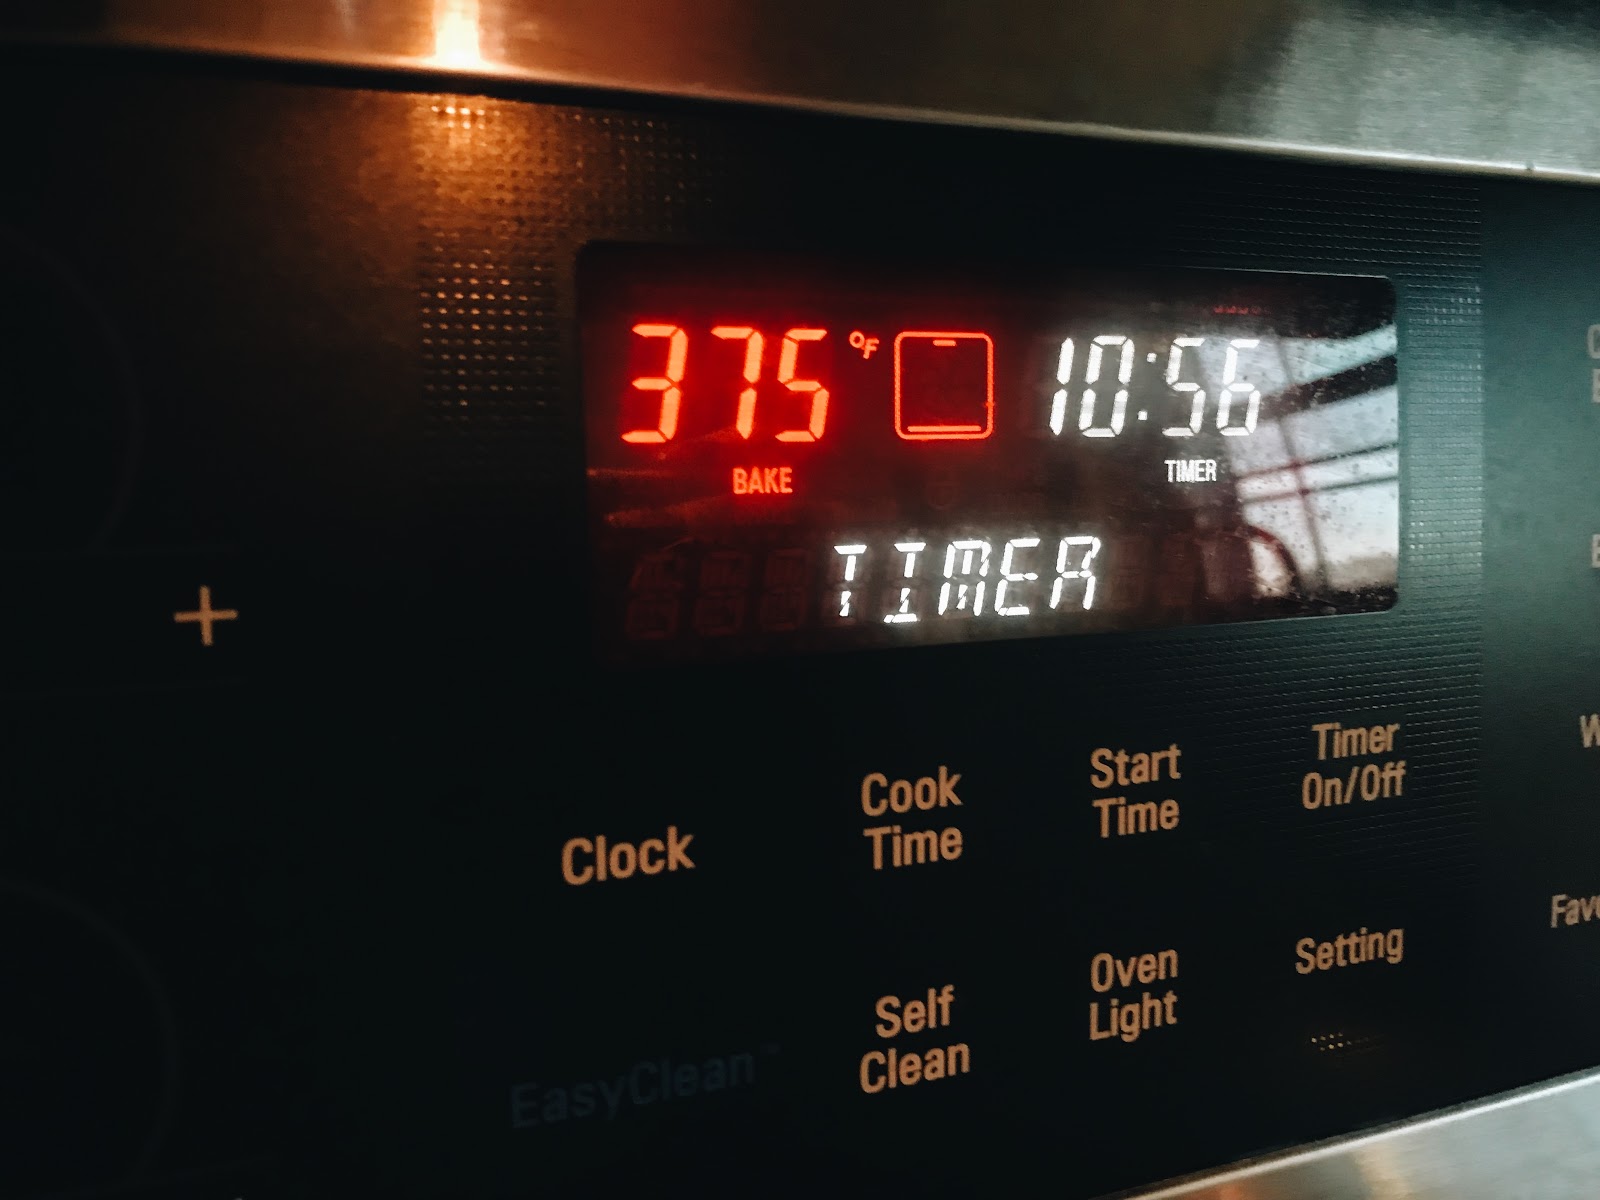
Since we already preheated our oven it should be ready for us to put our cookies in. Go ahead and place your first batch of cookies in. Set your timer for roughly eleven minutes. During the wait, if you still have cookie dough left, repeat the steps just completed. This way once the first batch has finished baking we can replace them with our second batch! This time around while we are waiting for our first set of cookies to cool and the second ones to finish baking I like to clean up a bit so we have a nice area to frost.

10373594-BF5E-478E-BC83-1BB17966136C.jpgC727FDBB-FE47-4E4A-B50E-4912E1458101.JPG

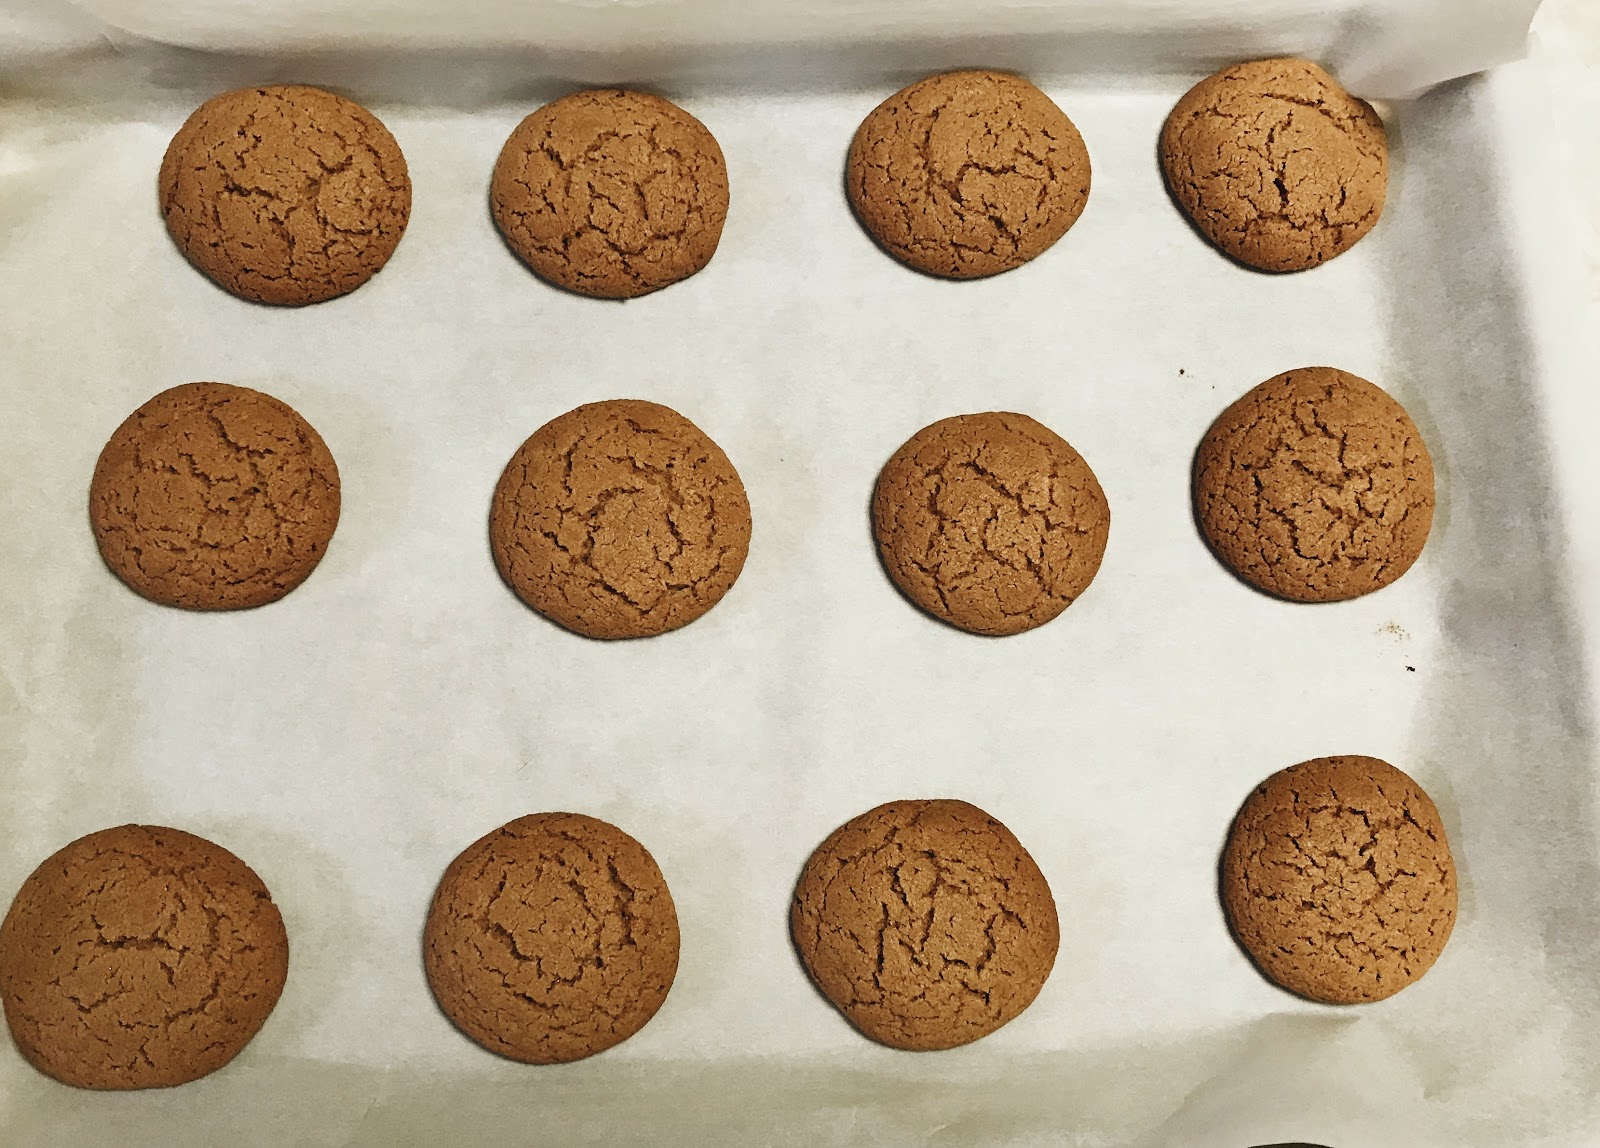
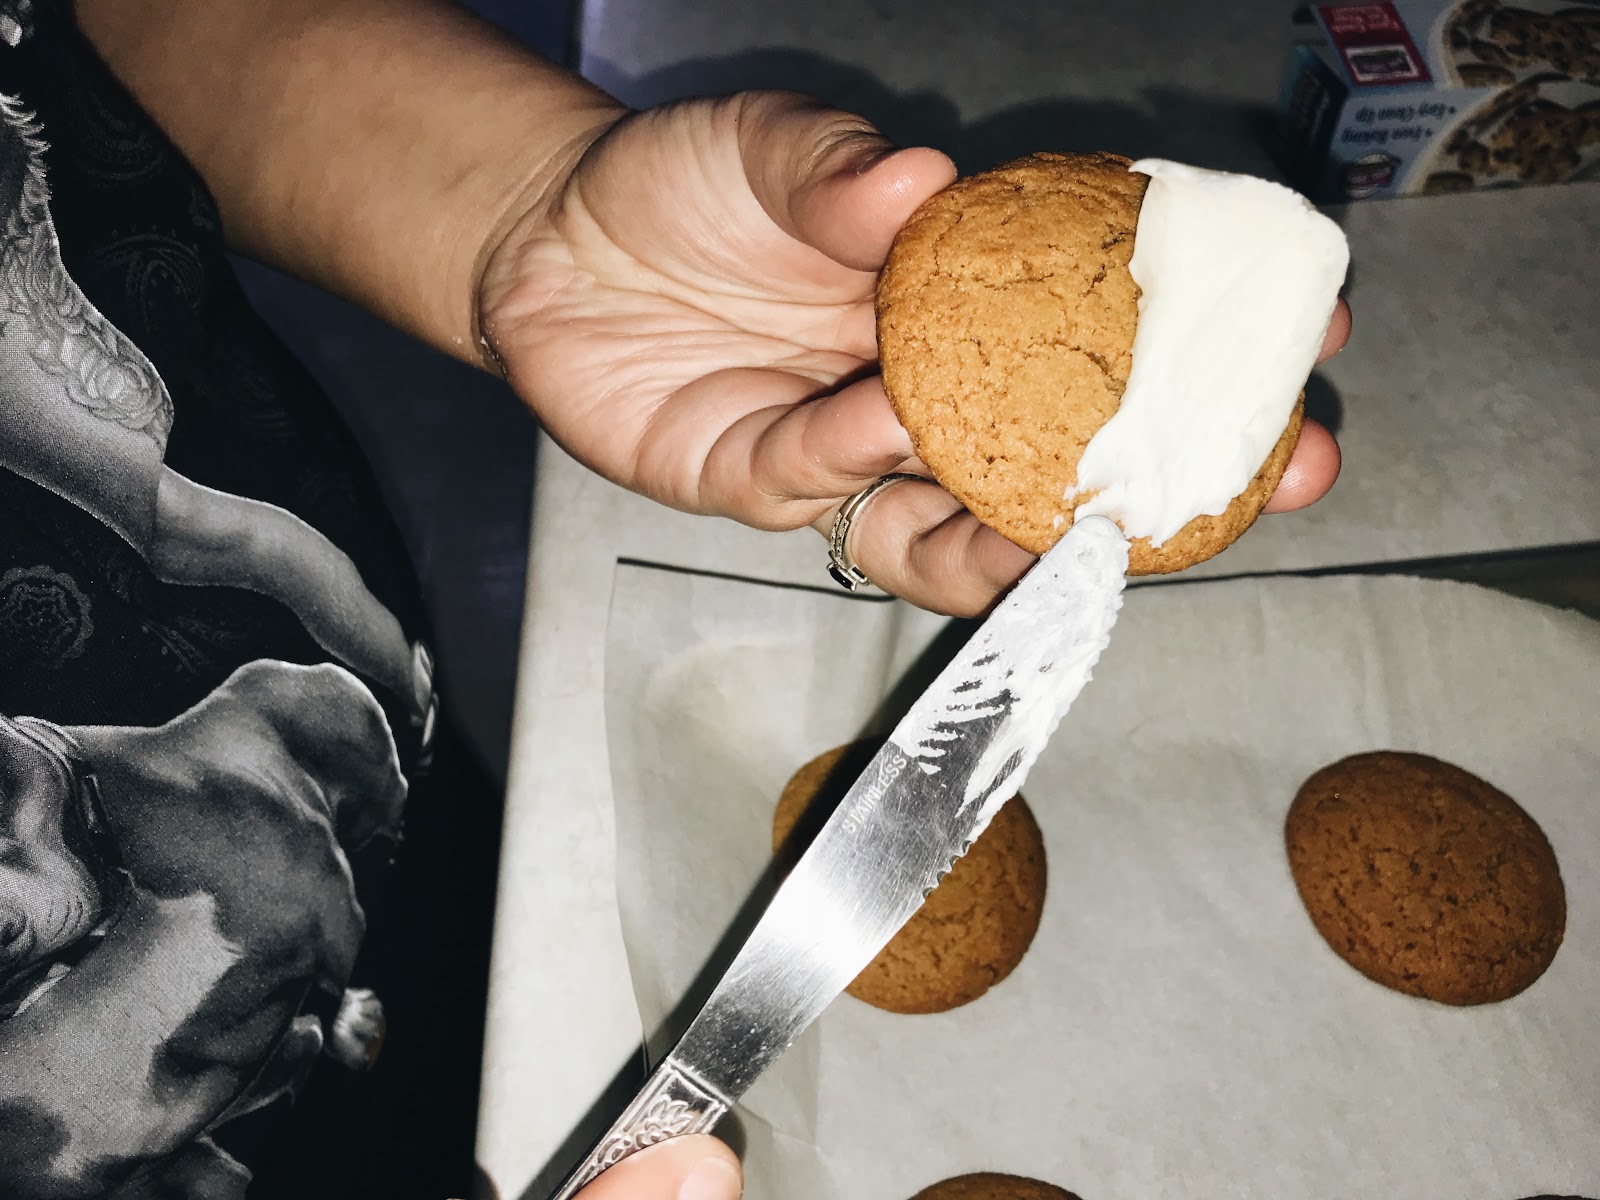
Once all cookies are baked and cooled we can begin to frost. Make sure you let your cookies cool nicely so when we smear the frosting over top we don’t rip the top off the goody. You can have as much fun with this step as you want. I like to frost on the topping in semi circles so I can get this cool whip effect but that is totally optional.


20EE0898-2CE8-453A-8BCF-64A175430FA1.JPG

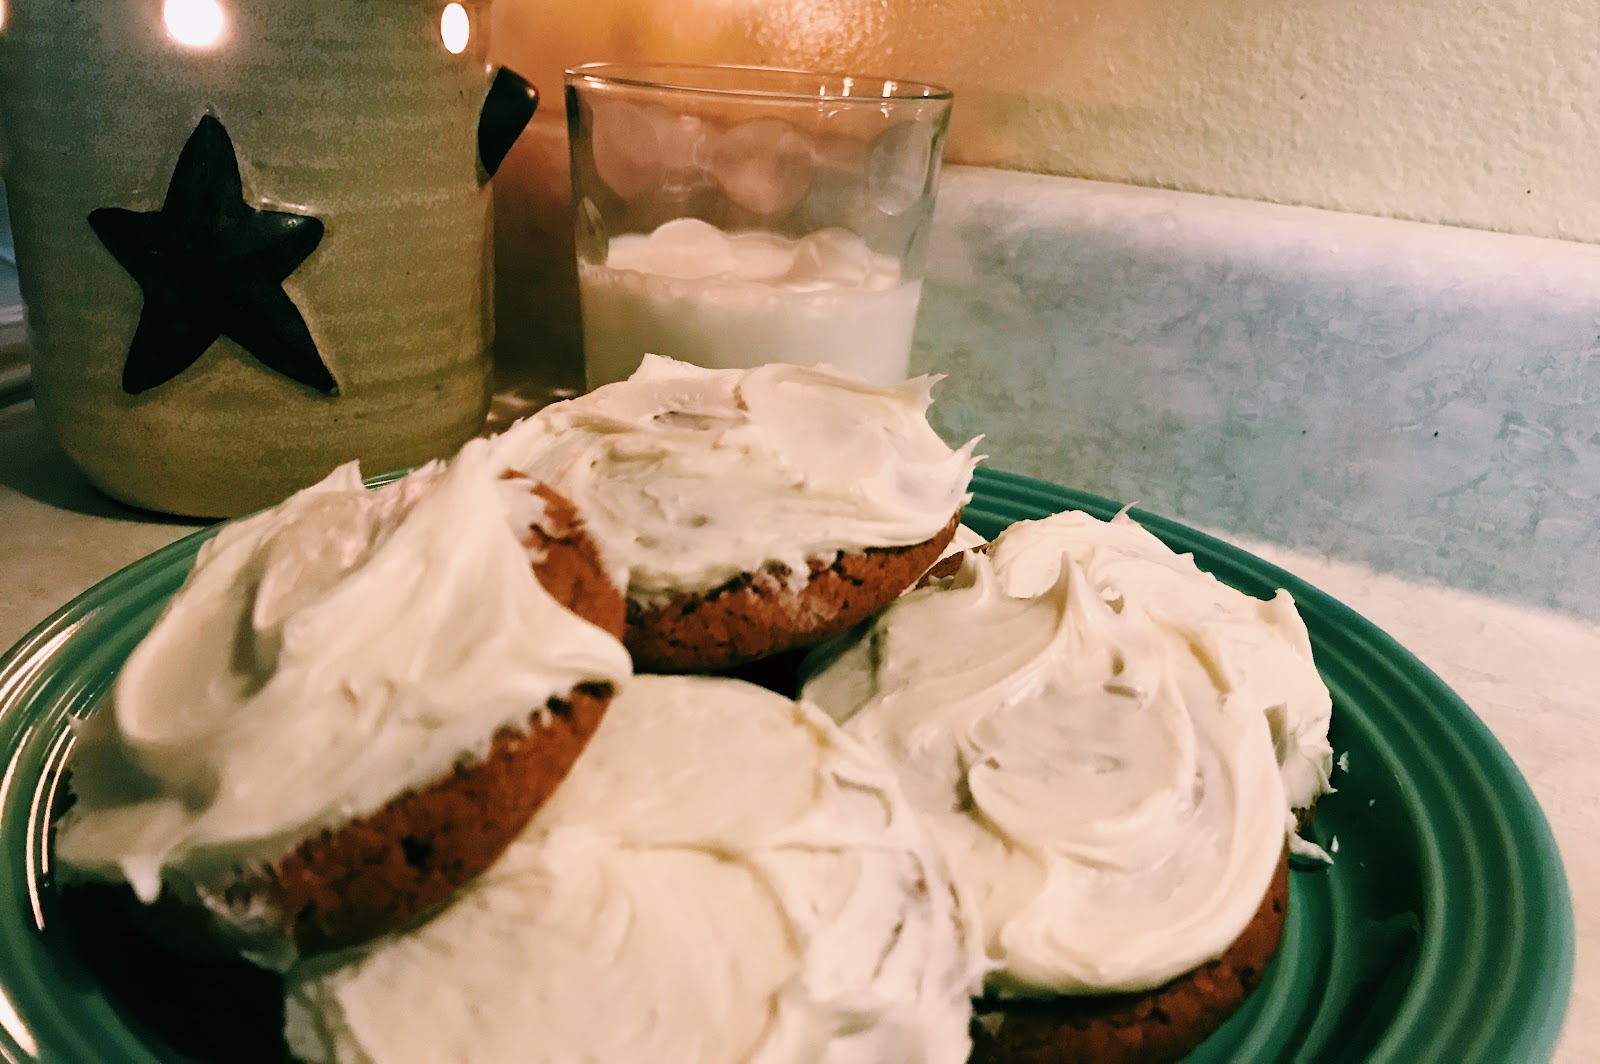
Now that we have finished preparing and baking, it's time to set them out and enjoy! I hope you had fun with creating these delicious pumpkin goodies!

Wednesday, October 25, 2017

Fabulous Football Fruit Tray


FullSizeRender (7).jpg


Anytime you have people gathering together, you always end up having cupcakes, chips, and junk food. The same sugary treats may be delicious, but they do get boring after a while. For me, I would way rather have something natural then a sugary chocolate brownie, but I also want something sweet. That’s why the perfect solution for something sweet and healthy, is fruit.
As football season is here, we must account for those tailgating parties in the parking lot outside the field before game time. It is then that we ask ourselves, “What should we have?”. That’s why I (with the help of another pinterest user) came up with a master plan of healthy, sweet, and creative. Meet the fabulous football fruit-tray.


Supplies:
  • Watermelon
  • Grapes
  • Blueberries
  • Cantaloupe
  • Knife
  • Ice cream scoop
  • Spoon
  • Cullender
  • Straws
  • Toothpicks


First of all, you will want to pick out your fruit. You want to make sure that you have the best fruit possible, so here are some tips to help you figure out what is the best.
Watermelon: The watermelon should be heavy. Also, the watermelon should sound hollow. The yellow spot should be a creamy yellow as well.
Grapes: The grapes should be firm, and should not be mushy. The color should also be vibrant depending on which color you end up choosing.
Blueberries: Along with the grapes, blueberries should be firm, and they should not be mushy. They should also have a purplish color to them.
Cantaloupe: The outside of your cantaloupe should be a little soft. You should be able to push into the stem a little, but not too much. Also, if you shake the cantaloupe and can hear the seeds moving around, it means that the cantaloupe is extremely juicy.


The next step is to clean all of the fruit. For the grapes and blueberries, it is extremely simple. Just place them into the colander and run COLD water over them for about a minute. You want to make sure that you are moving the colander around and shaking it so that every one of the berries gets cleaned.


IMG_7734.JPGIMG_7741.JPG


The cantaloupe is a bit harder, but still is not to bad. Cut the cantaloupe in half. Using a spoon, remove the seeds from the fruit. Once all of the seeds are removed, cut each half into half again. Then you will want to cut each quarter into half to make it into eight pieces. You then will want to slice the pieces one at a time. Remove the outside of the fruit, so you’re left with a strip of fruit. You then will want slice each strip into piece of your choice. I tend to like bigger chunks of fruit, so I tend to cut mine into four or five pieces.
FullSizeRender (1).jpgFullSizeRender (3).jpgFullSizeRender (5).jpgFullSizeRender (6).jpgFullSizeRender (9).jpgFullSizeRender (11).jpg


The watermelon will be the final fruit that you will be cleaning. This is the most important part because the outside of the watermelon with be the container for holding the fruit. Cut the watermelon in half the long way. Using a spoon, or ice cream scoop, scoop out one of the halves of the fruit. This should create balls of watermelon so that they can be mixed in with the rest of the fruit (and it’s way easier to clean)! After all of the fruit is out of the shell, cut a small part off of the round part of the shell, so that it can sit flat. Do not throw this away, you will need it! Using a knife, carefully cut it into a football shape. On the green side, carve a line with three lines going over top of it to make it look like the strings of a football. Stick a toothpick on it, and it’s ready to go.


FullSizeRender (13).jpgFullSizeRender (14).jpgIMG_7699.JPGIMG_7700.JPGIMG_7707.JPG


Using a straw, you will make the field goals. For mine, I used bendy straws, so they worked extremely well. I stuck one end of one into the one end of the other one. I then took a third straw and wrapped it around the goal to make the post. I then took a little bit of scotch tape to secure it. Stick them into the ends of the watermelon bowl, and stick the football in the middle of the side using the toothpicks to support it and hold it up. Fill the bowl up with the cleaned fruit, and there you have it. The fantastic football fruit tray for your next tailgating event.

FullSizeRender (12).jpgIMG_7722.JPGIMG_7723.JPGIMG_7713.JPGIMG_7727.JPGIMG_7751.JPGFullSizeRender (7).jpg

Crowd Winning Weenies


IMG-1669.JPG


I love watching football games with my family. My Dad and I are into the game while my two sisters and my mom are into the food. Our favorite food for the game is “Crowd Winning Weenies”. This finger food will be sure please your family and friends.  It has the perfect combination of sweet and salty. Here is an easy and great tasting recipe for bacon wrapped weenies.


Ingredients:

  • One pound of sliced bacon

  • One package(14 oz) of cocktail weenies

  • ¾ cup of brown sugar(I used 1 cup to make mine sweeter)

  • You will need lots of toothpicks


First, start off by preheating your oven to 325 degrees F and make a pile of toothpicks so you don’t contaminate all of your tooth picks

IMG-8760.jpeg


Second, cut your bacon into thirds.

Next take one of your weenies and wrap a slice of bacon around it, then stick a toothpick in to hold it together.

IMG-8764.jpegIMG-8765.jpeg


Lastly, once all weenies are are wrapped and on a baking sheets, sprinkle the brown sugar over them.

IMG-8770.jpegIMG-8766.jpeg


Bake for 45 minutes, enjoy.

This is a great 3 ingredient recipe that will please everyone at your tailgating party. It does take a little time to wrap  so if you don’t have time Sunday morning I would recommend wrapping them Saturday.  Sprinkle the brown sugar and cook them in the morning.  Enjoy these tasty treats and the
game.

IMG-1669.JPG