Monday, October 3, 2016

D.I.Y Canvas Quote

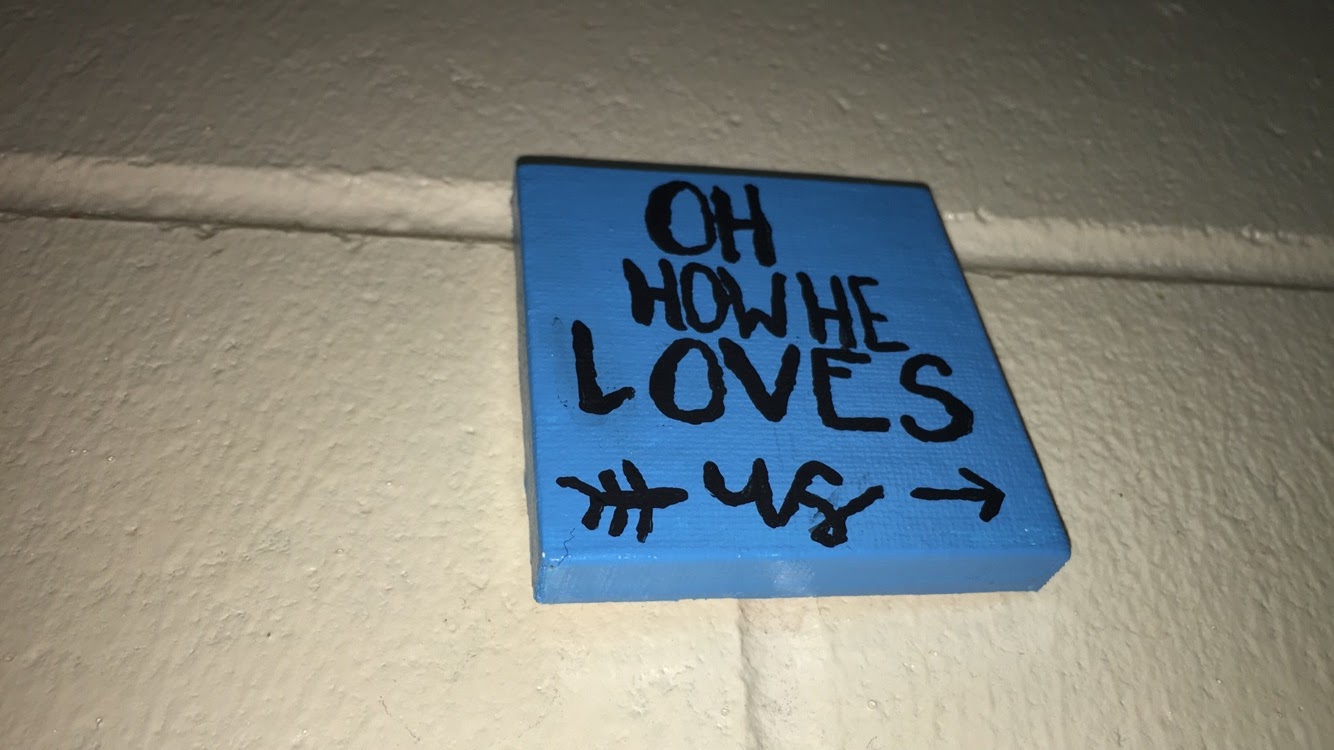
When I paint canvases, it helps my mind fill with ideas. You can paint anything you want on them and make them your own. Canvases come in many different sizes and you can create your own painting. What is nice about these projects is you can use them wherever you want and they are a lovely decoration. I chose to paint a tiny canvas with a quote from the Bible. Now I'll show you the steps into making a nice and simply decor to put anywhere you would like!


Supplies:

  1. Canvas (any preference size)
  2. Black and Blue paint (can choose any colors) and brushes Step 1: Take the blue color and start to paint the canvas. Once the first layer dries add a second coat to make it look thicker.


Step 2:  Once the blue is dry, paint your quote onto the canvas with the other paint. Also for the quote add another coat to it.


Making this project was fun and easy. You can put this canvas anywhere you want and for me I'm going to hang it up on my wall to wake up to it every morning!

Festive Fall Nails
20160927_123109.jpg
Fall is officially upon us! Keeping up with the seasons with fun fall outfits or buying a new pair of books. What better way to top off the look than with festive fall nails? Here is a quick easy tutorial that will look like you got a manicure.

What You Will Need:
20160926_123607.jpg
  • Nail Polish remover
  • Nail polish remover wipes (optional)
  • Nail buffer
  • Nail clippers
  • Nail file
  • Cotton pads
  • Nail Polish ( a background color and whatever color you want your leaves to be)
  • Leaf stencil
  • Plastic scraper
  • Rubber stamper
  • Favorite smelling lotion

How To Do It:20160926_124454.jpg
  1. Wash your hands, get all of the excess dirt off of your nails and hands. After that, cut your nails with the clippers and shape nails with your file.

20160926_124716.jpg

  1. Next, use your nail buffer and smooth your nails. When all of your nails are smooth add a layer of clear polish. (Tip: The clear coat helps to smooth down your nails so the colored polish goes on smoother. Also the clear coat ensures that your nails keep the design on longer.)
  2. After you have one clear coat, paint your nails with the base color (in my case it's white), and let dry. Then a second.

20160927_122426.jpg

  1. Now it's time to do the design.

20160927_122536.jpg

    1. The first step in doing the design is filling the stencil with polish, by simply painting nail polish over the design you wish to have on your nails.

20160927_122543.jpg

    1. The second step is scraping the excess polish off so there is only polish left in the design.

20160927_122553.jpg

    1. The third step is taking your rubber dobber and lifting the design off of the stencil( press the rubber dauber down over the stencil.)
    2. The fourth and final step is to press the dobber (with lifted design) onto your nail (Tip: I do this in kindof a rolling motion. The design doesn't stick to well if you just bring the stamp straight down.)20160927_122603.jpg

20160927_123124.jpg

  1. Let designs dry (they dry relatively fast) and then paint a clear coat on all of your nails.

20160927_123206.jpg

  1. Your final step is to put some good smelling lotion on your hands. The nail polish remover tends to dry out your hands, especially the skin right around your nail. I found that lotion helps with the drying immensely.

20160927_123109.jpg

Now you know how to paint your own salon looking nails at home.This process, overall is very easy and with more practice, the faster you will get and the better they will look. Not to mention you saved about 30 dollars depending on the salon you might go to. I hope you have fun trying these nail painting technique out.
Puppy Chow

Along with fall comes many parties with a lot of food. It can always be stressful to find fun fall themed recipes to put out at parties that are also quick and easy to make. Puppy chow is a simple delicious recipe you can use for all sorts of parties.

Puppy Chow

File_008.jpeg
Ingredients:
  • 9 cups crispy rice cereal squares
  • 1/2 cup peanut butter
  • 12 oz. bag semi-sweet chocolate chips
  • 1 1/2 cups confectioners´ sugar
Directions:
  1. In a saucepan over low heat, melt the chocolate; add peanut butter and mix until smooth.
File_001.jpeg
  1. Remove from heat, add cereal and stir until coated.File_006.jpeg
  1. Pour powdered sugar over coated cereal in a tupperware container and shake until well coated.
File_007.jpeg
This recipe was so simple and fun to make. I highly recommend you make this delicious dessert for any party you throw.